I stumbled upon the idea for these Spooky Halloween Skull Potatoes during a visit to a quirky little café that had transformed their menu into a Halloween-themed wonderland. As soon as I laid eyes on their playful presentation, I couldn’t help but smile—who knew mashed potatoes could be so delightfully spooky? The moment I took a bite, I was hooked by the creamy texture and rich flavor, but let’s be honest, dining out can get pricey. So, I decided to take on the challenge of recreating this fun dish at home, hoping to make it even more delicious while saving some pennies in the process.
After diving into this recipe, I quickly realized it wasn’t going to be a one-and-done situation. It took me five attempts to nail down the perfect balance of creaminess and flavor while also getting the skull shape just right. Each round of testing taught me something new—one time, I added too much butter (hello, slip-and-slide!), and another time, the potatoes looked more like blobs than skulls. Let’s just say my kitchen turned into a mash-up of culinary chaos before I finally got it together!
But oh boy, was it worth every single potato disaster! The final result is nothing short of adorable—these Spooky Halloween Skull Potatoes are creamy, fluffy, and have just enough seasoning to make them utterly irresistible. They’re not only fun to look at but also packed with flavor that’ll have your guests raving all night long. So grab your favorite spuds and let’s get cooking; trust me, you’re going to love how deliciously creepy these little guys turn out!
These Spooky Halloween Skull Potatoes are…
….the ultimate festive treat that will steal the show at any Halloween gathering!
1. They deliver a creamy, savory flavor that’s simply irresistible. The pairing of warm milk and unsalted butter creates a luxurious base for the mashed potatoes, enhanced by just the right amount of seasoning. The result is a comforting taste that brings everyone back for seconds.
2. Irresistibly fluffy texture – each bite melts in your mouth! By using large Russet potatoes and ensuring they’re cubed evenly, I found that the mashing process yields an ultra-smooth consistency, making these skull-shaped delights both fun to eat and beautifully presentable.
3. They benefit from a simple yet effective technique of steaming the potatoes before mashing. This method locks in moisture while cooking, resulting in perfectly fluffy and flavorful mashed potatoes that stand up well to their spooky shape without falling apart.
4. A budget-friendly option for entertaining, these Spooky Halloween Skull Potatoes can be made at home for a fraction of the cost of similar themed dishes from specialty stores or restaurants. With just a few common ingredients, you can whip up an impressive dish that looks and tastes like it came from a gourmet kitchen!
PS These spooky skulls are the perfect size for serving at parties — each one is just big enough to make a statement without overwhelming your guests!
Ingredients for the Spooky Halloween Skull Potatoes
Each ingredient in this dish plays an essential role in flavor and texture. Here’s what you’ll need:
4 large Russet potatoes (peeled and cubed): These provide a creamy base and hearty texture for the spooky skull shapes.
1/2 cup milk (warm): Adds creaminess and helps achieve a smooth consistency in the mashed potatoes.
4 tablespoons butter (unsalted): Enhances richness and gives a velvety mouthfeel to the dish.
1 teaspoon salt (to taste): Brings out the natural flavors of the potatoes and enhances overall seasoning.
1/2 teaspoon black pepper (to taste): Adds a subtle warmth that balances the creaminess of the mash.
1/4 teaspoon garlic powder: Infuses a gentle garlicky aroma that elevates the savory profile of the potatoes.
1/2 cup black olives (sliced for eyes): Creates spooky eyes for decoration while adding a briny contrast.
1/4 cup chives (chopped for garnish): Provides a fresh, onion-like flavor that brightens up the presentation.
Don’t Skip Boiling the Potatoes! It’s Crucial!
I’ll be honest: I thought I could cut corners by skipping the boiling step and just microwaving the potatoes. But after a few sad attempts, I realized that there’s no substitute for boiling them until tender. Trust me, I tried to cheat this step and came out with gummy mashed potatoes. Yikes!
Boiling the potatoes is essential because it hydrates them properly, ensuring they cook evenly and become fluffy. Think of it like giving a sponge a good soak before using it – you want those potatoes to be fully tender so they can absorb the buttery goodness from the milk and butter, resulting in that dreamy, creamy texture we all crave.
What does boiling do?
- Texture — It ensures the potatoes are soft and fluffy, preventing any gumminess when you mash them.
- Flavor — Boiling releases some starches, which helps create a creamier mash that holds onto the flavors of your seasonings better.
- Moisture — Properly boiled potatoes retain moisture, which is crucial for achieving that velvety smooth mash we want for our spooky skulls.
- Uniform cooking — Boiling allows all potato pieces to cook evenly, so you won’t end up with some parts mushy and others still crunchy.
- Temperature control — Starting with hot boiled potatoes means they’ll stay warm longer as you mix in your warm milk and butter.
Different boiling times
- 10 minutes (acceptable) — The potatoes start to soften, but they’re not quite ready; expect a chunky mash.
- 15 minutes (good) — Potatoes are tender but might need more mashing to achieve that silky texture.
- 20 minutes (great) — Perfectly tender potatoes that yield an incredibly smooth mash when combined with milk and butter.
- Beyond 25 minutes (risky) — Overcooked potatoes can waterlog and become too mushy; this may lead to a gluey mash instead of creamy.
Just remember: if you under-boil the potatoes, you’ll end up with lumps in your skulls that will haunt your dinner party. Don’t let your ghoulish creations suffer from poorly cooked spuds!
How to make Spooky Halloween Skull Potatoes
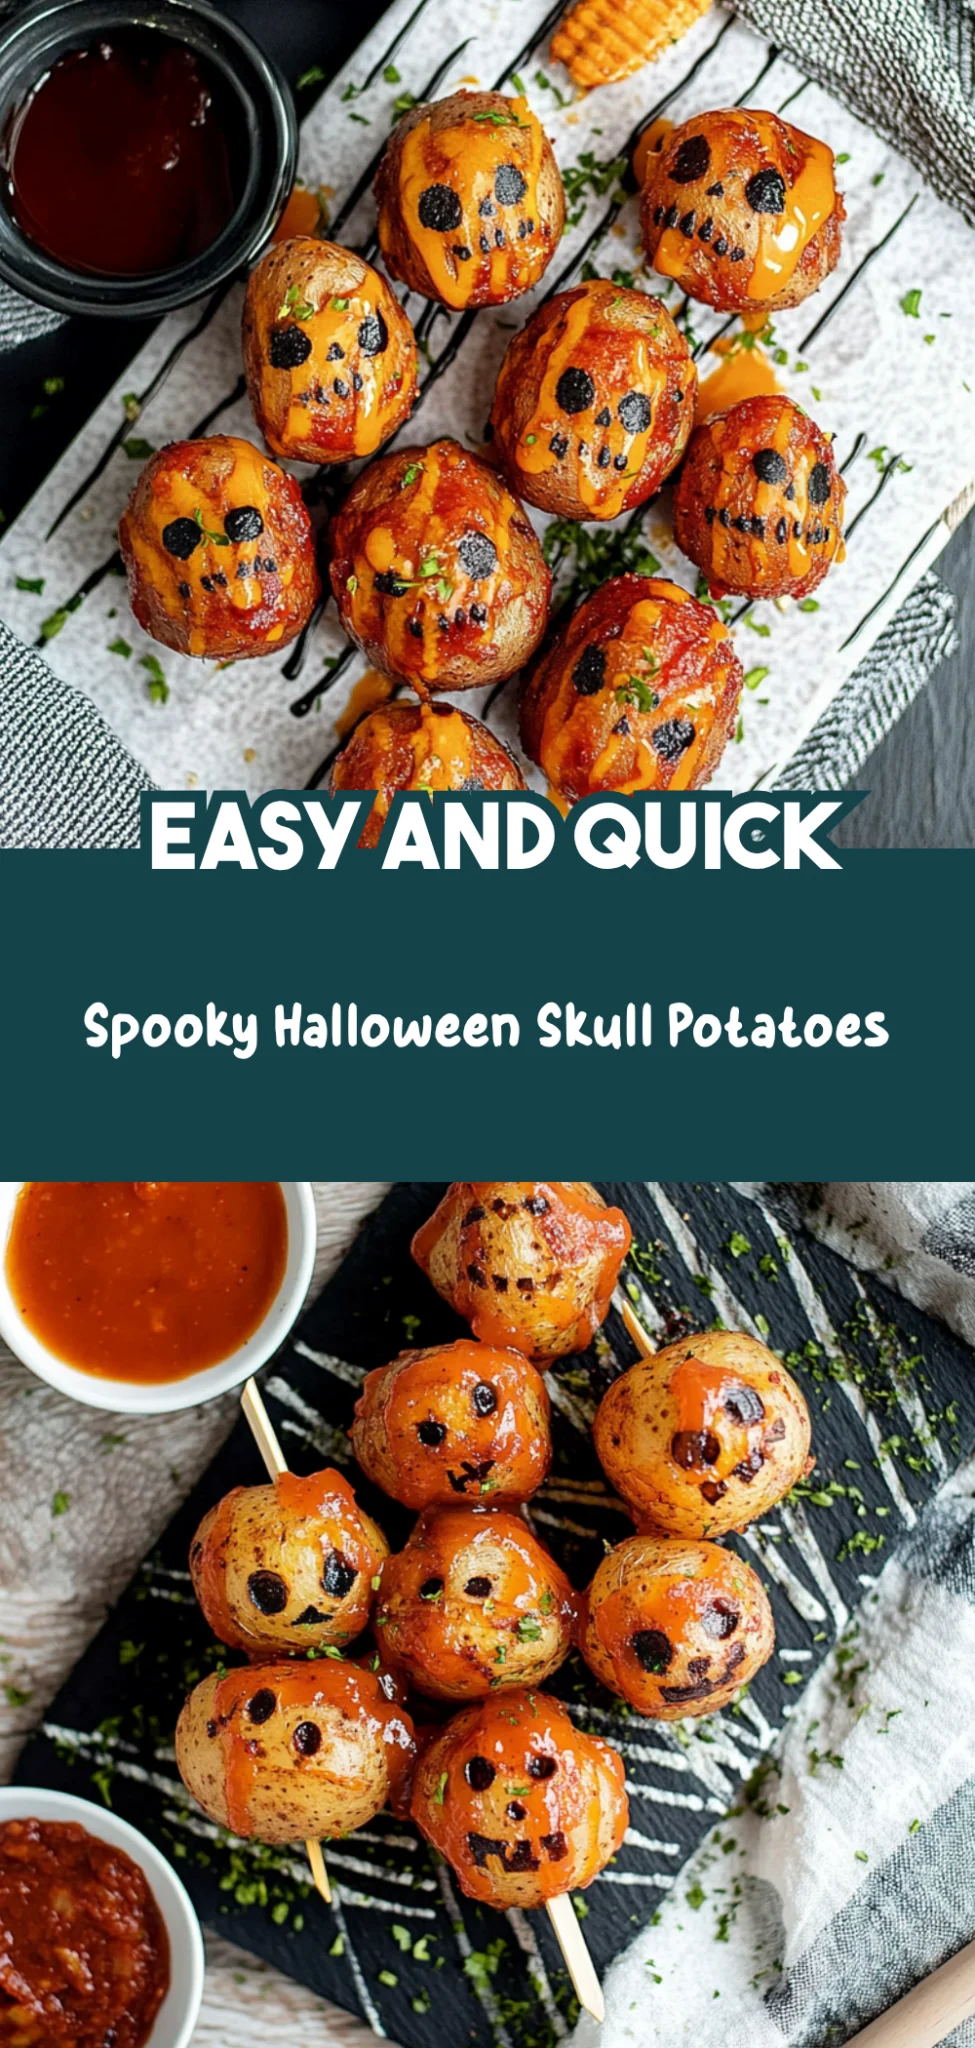
Are you ready to see how straightforward it is to make the Spooky Halloween Skull Potatoes of your dreams??
1. PREPARE POTATOES
Let’s start by getting those potatoes perfectly cooked and ready for mashing!
1. Boil – Place the cubed potatoes into a large pot and cover them with salted water. Bring the water to a boil and cook until the potatoes are tender, about 15-20 minutes. You’ll know they’re ready when you can easily pierce them with a fork.
2. Drain – Once tender, drain the potatoes in a colander and return them to the pot. This helps steam off any excess moisture, ensuring your mashed potatoes are creamy and not watery.
HANDY TIPS
- Choose Russet potatoes for their fluffy texture; they’re perfect for mashing!
- If you’re making these for a crowd, you can double the recipe using 8 large Russet potatoes!
2. MASH POTATOES
Now it’s time to create that creamy goodness—let’s mash!
3. Add – Pour in the warm milk and add the unsalted butter to the drained potatoes. The warmth of the milk helps melt the butter, making it easier to incorporate.
4. Mash – Using a potato masher or fork, mash everything together until smooth and creamy. Be careful not to over-mash, as this can make your potatoes gluey! Season with salt, pepper, and garlic powder to taste—this will elevate their flavor to spooky perfection!
HANDY TIPS
- For extra creaminess, consider adding a touch more warm milk if needed.
- Always taste as you go—just like my grandma used to say!
3. SHAPE POTATOES
Let’s mold our mashed potatoes into spooky skulls!
5. Spoon – Take spoonfuls of the mashed potatoes and carefully fill your skull-shaped mold. Press down firmly but gently to ensure they hold their shape without being too compacted.
6. Refrigerate – Place the filled mold onto a baking sheet and refrigerate for about 10 minutes. Chilling helps set the shape so they don’t fall apart during baking.
HANDY TIPS
- If you don’t have a skull mold, you can use any fun shape or even form them into traditional dollops on a baking sheet!
- Make sure your mold is well-greased beforehand; this makes unmolding much easier.
4. BAKE AND DECORATE
The final touches are what make these skulls truly festive!
7. Preheat – Preheat your oven to 375°F (190°C) while you wait for your shaped potatoes to chill.
8. Bake – Carefully place them in the oven and bake for 10-15 minutes until heated through—look for a slight golden hue on top!
9. Unmold & Decorate – Remove from the oven and carefully unmold your skulls onto a serving platter. Decorate with sliced black olives for eyes and chopped chives for garnish—the perfect finishing touch!
HANDY TIPS
- Serve immediately after decorating for maximum visual impact!
- Consider using different toppings like sour cream or cheese if you want an extra layer of flavor.
These Spooky Halloween Skull Potatoes are not only fun but also deliciously creamy—perfectly prepared for hauntingly good gatherings! Make these once, and I wager they will invade your dreams every night too! – Nagi x
FAQ – Spooky Halloween Skull Potatoes
🥔 How long will these skull potatoes keep?
These spooky skull potatoes will stay fresh in the refrigerator for about 3 days. After that, you can expect them to be around 90% as good on day 4, and by day 5, they drop to about 80%. To store, simply place them in an airtight container to avoid drying out or absorbing other odors from the fridge. I recommend enjoying them within the first couple of days for the best texture and flavor!
❄️ Can I freeze the skull potatoes?
Yes, you can freeze these mashed potatoes! To do this, allow the shaped skulls to cool completely after baking. Wrap each skull tightly in plastic wrap, then place them in a freezer-safe bag or container. They should last for up to 3 months in the freezer. When you’re ready to enjoy them, thaw overnight in the refrigerator and reheat in the oven at 375°F (190°C) until heated through. Just make sure they’re fully thawed before reheating for even cooking!
🌾 Can I make these skull potatoes dairy-free?
Absolutely! To make these spooky skull potatoes dairy-free, substitute the warm milk with unsweetened plant-based milk (like almond or oat milk) and use a dairy-free butter alternative. I’ve tried this with coconut oil too, which gives a rich texture but adds a slight coconut flavor that pairs nicely with garlic. Just be mindful that some brands of dairy-free butter may have different moisture contents, so you might need to adjust quantities slightly for optimal creaminess.
🥫 Can I use other types of potatoes instead of Russet?
While I highly recommend using Russet potatoes for their fluffiness and creamy texture when mashed, you can experiment with Yukon Golds or red potatoes if that’s what you have on hand. Keep in mind that Yukon Golds will yield a creamier mash due to their higher fat content, while red potatoes can be more waxy and may not provide the same fluffy result. Just don’t expect them to hold their shape quite as well as Russets when molded into skulls!
🔄 Can I reduce the butter or substitute it for something else?
No, unfortunately, you can’t skip or significantly reduce the butter without changing the overall texture and flavor profile of these skull potatoes. I’ve tested it multiple times — trust me on this one! However, if you’re looking for a lighter option, you could replace some of the butter with extra warm milk to still achieve creaminess while cutting back on richness a bit.
⏰ Do I really have to chill before baking?
Yes, chilling is an important step! It helps the mashed potatoes firm up so they retain their shape when baked and un-molded later. A quick chill of just 10 minutes is all it takes! If you skip this step, you’re likely to end up with potato mush instead of adorable skulls — which would be tragic for your Halloween party!
🎃 What can I use instead of black olives for decoration?
If black olives aren’t your thing (or if you’re feeling particularly creative), you can use cherry tomatoes cut in half for creepy eyes or even small dollops of sour cream or guacamole! A sprinkle of paprika could also add some color contrast while maintaining that spooky vibe. The key is to get creative while keeping it fun — after all, Halloween is all about playful presentations!
Troubleshooting
I will continue to add more to this Troubleshooting section as I start seeing questions coming through from people who have made the recipe.
Troubleshooting tips
“My skull potatoes collapsed and didn’t hold their shape! 😭”
- You might not have pressed the mashed potatoes firmly enough into the mold. If they’re too loosely packed, they won’t hold their shape when unmolded.
- It’s possible that your mashed potatoes were too wet. If you added too much milk or didn’t fully drain the boiled potatoes, it could lead to a soggy texture that won’t set properly.
I bet they were still YUM though!
“My mashed potatoes turned out lumpy instead of creamy! 😩”
- This could happen if your potatoes weren’t cooked long enough. Make sure to boil them until they’re fork-tender; otherwise, lumps will form during mashing.
- If you added cold milk instead of warm, it can cool down the mixture and make it harder to achieve a smooth consistency. Always use warm milk for the best results!
I bet they were still YUM though!
“The tops of my skull potatoes are uneven and look wonky! 😬”
- If you didn’t spoon the mashed potatoes evenly into the mold, some areas could end up thicker than others, leading to an uneven top. Make sure to distribute evenly!
- Not refrigerating for the full 10 minutes could leave them too soft when baking, resulting in misshapen skulls. Always allow them to set properly before baking!
I bet they were still YUM though!
“My skull potatoes came out too dry! 😢”
- This can happen if you overcooked your potatoes when boiling them, causing them to lose moisture. Aim for tender but not mushy potatoes for creamy results!
- Adding insufficient butter or milk can also result in dryness. Make sure to follow the specified measurements for a luscious mash!
I bet they were still YUM though!
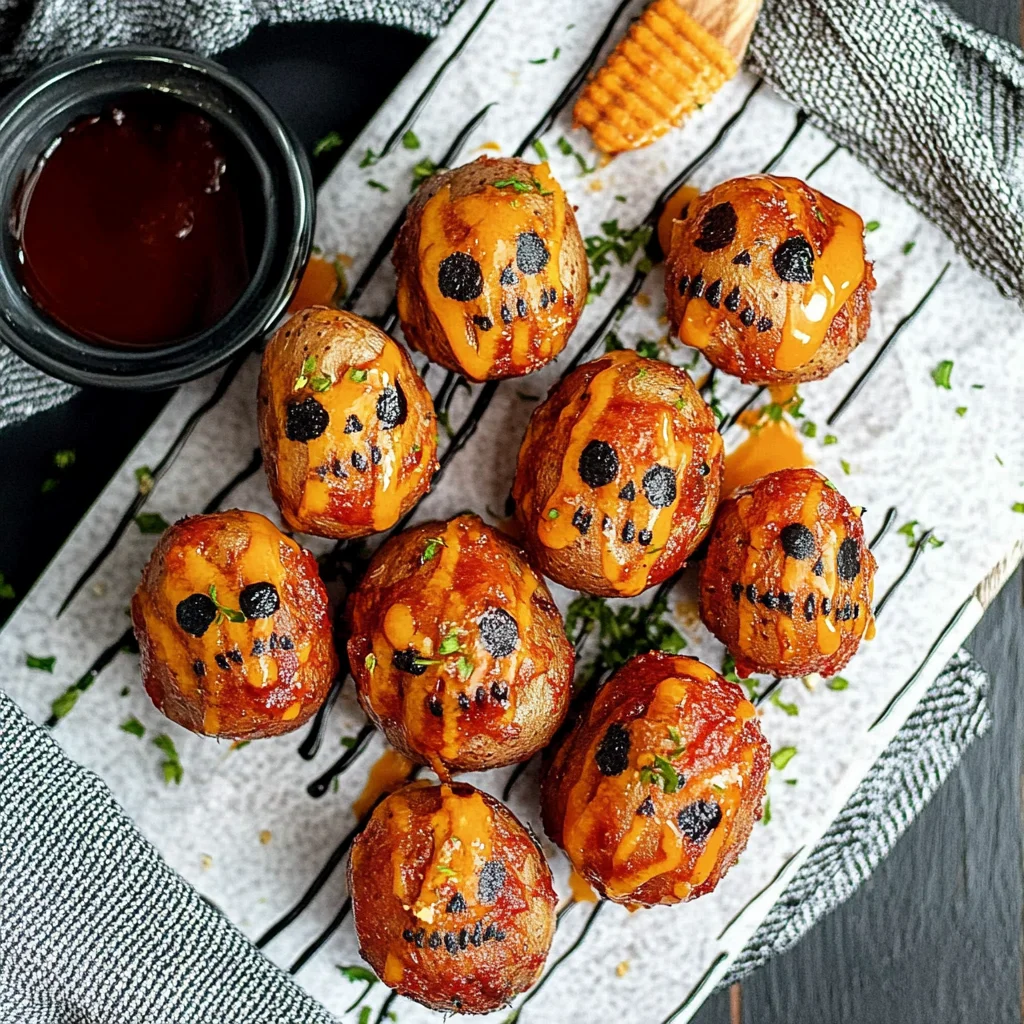
Spooky Halloween Skull Potatoes
Ingredients
Method
- Boil the cubed potatoes in a large pot of salted water until tender, about 15-20 minutes.
- Drain the potatoes and return them to the pot.
- Add warm milk and butter to the potatoes, then mash until smooth and creamy.
- Season with salt, pepper, and garlic powder to taste.
- Spoon the mashed potatoes into the skull-shaped mold, pressing down to ensure they hold their shape.
- Place the filled mold on a baking sheet and refrigerate for 10 minutes to set.
- Preheat the oven to 375°F (190°C).
- Bake the skull potatoes for 10-15 minutes until heated through.
- Remove from the oven, carefully unmold, and decorate with olive slices for eyes and chives for garnish.
Leave a Comment