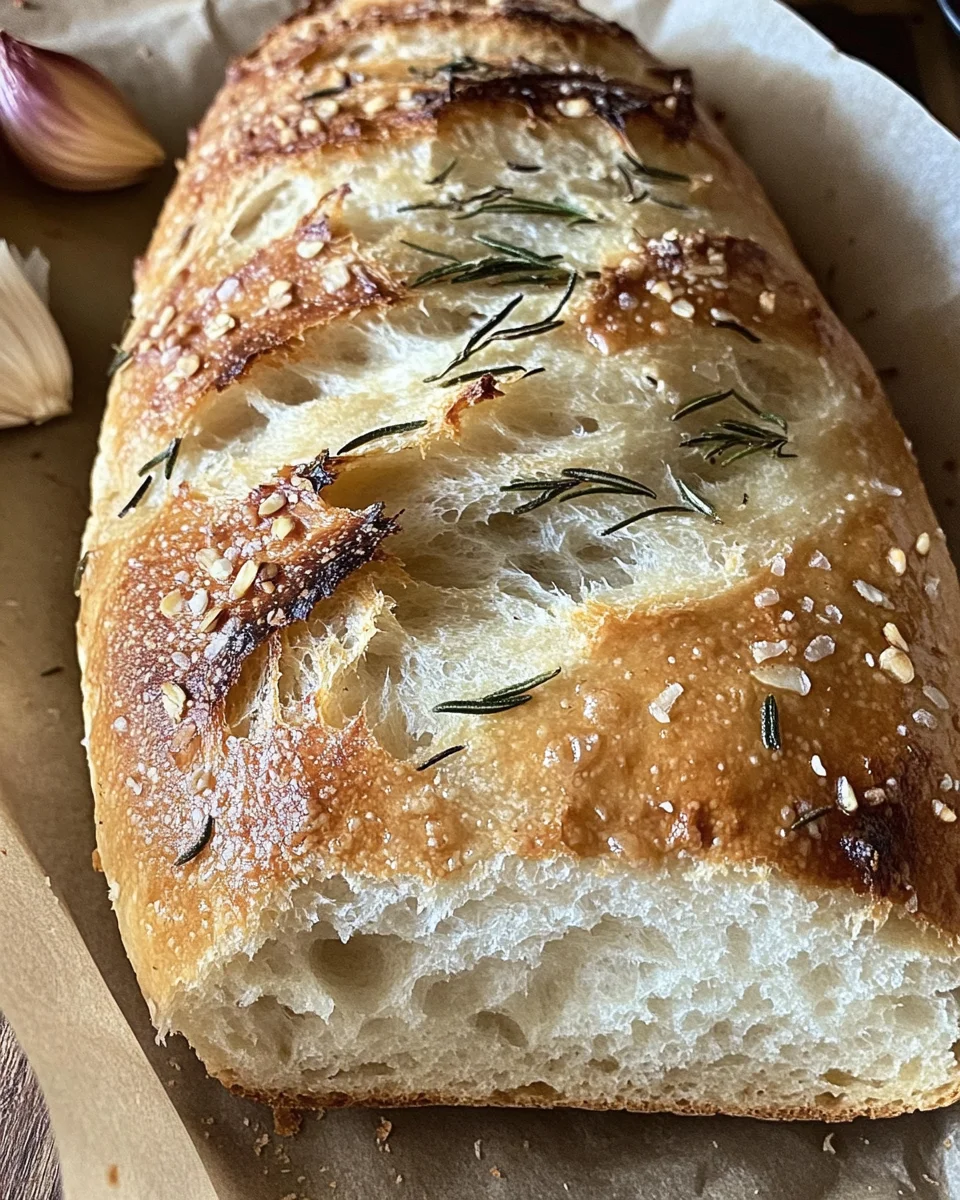
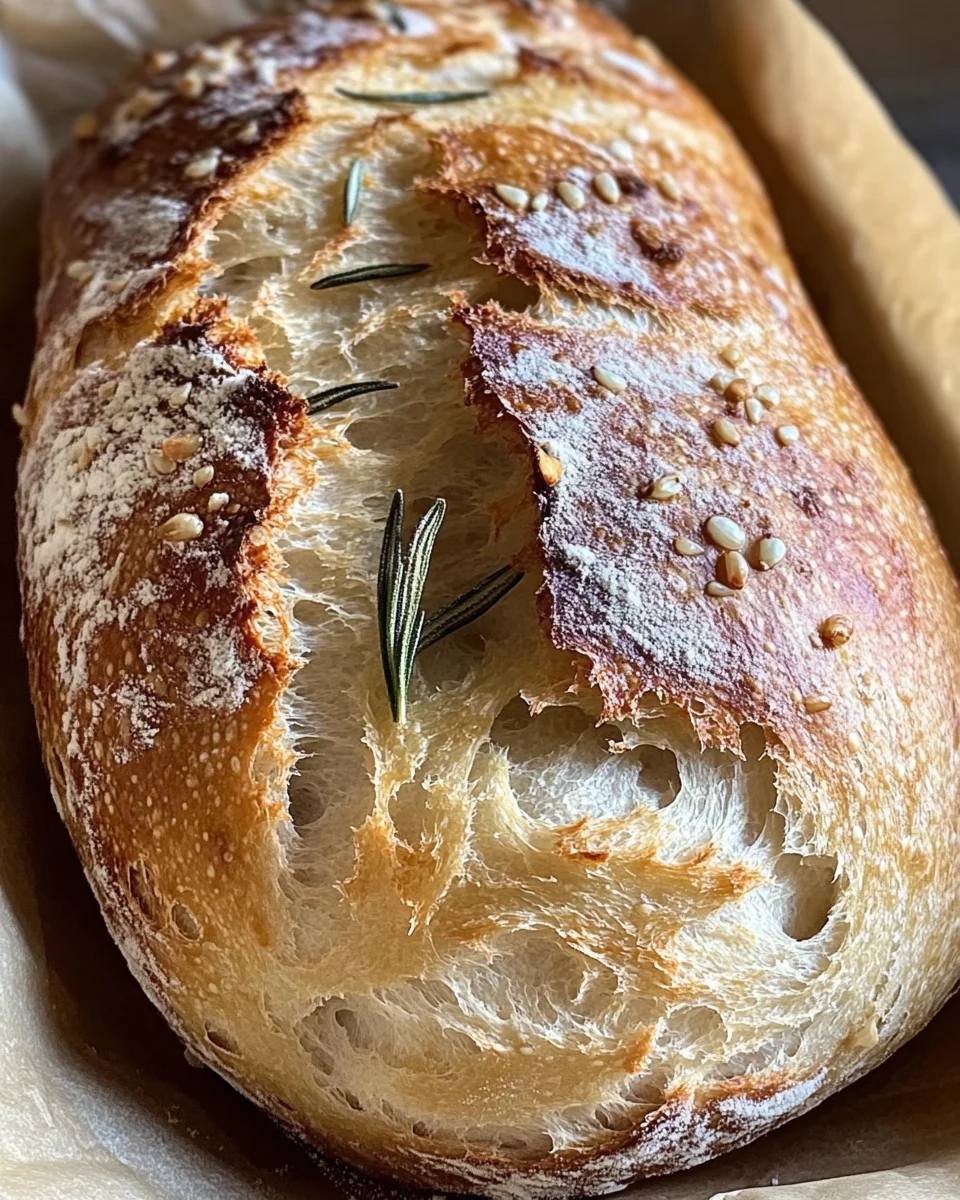
Crusty, chewy, herby and wonderfully fragrant, this simple no-knead Rosemary and Roasted Garlic Artisan Bread is everything a good savory loaf should be! Perfect for any occasion, whether you’re hosting a dinner party, enjoying a cozy night in, or simply craving some fresh bread. The combination of rosemary and roasted garlic creates an irresistible aroma that fills your kitchen and delights your senses.
Why You’ll Love This Recipe
- Easy Preparation: This artisan bread requires no kneading, making it simple enough for beginners to master.
- Flavorful Ingredients: The blend of roasted garlic and fresh rosemary adds a delicious depth to the bread.
- Versatile Uses: Enjoy it on its own, with butter, or as a side for soups and salads.
- Impressive Results: The crusty exterior and soft interior make this loaf look as good as it tastes.
- Make Ahead Option: You can refrigerate the dough overnight or up to 48 hours for greater convenience.
Tools and Preparation
Before diving into the recipe, gather all necessary tools to ensure a smooth baking process.
Essential Tools and Equipment
- Dutch oven
- Baking sheet
- Rubber spatula
- Parchment paper
- Wire cooling rack
Importance of Each Tool
- Dutch oven: Helps create steam while baking, resulting in a perfect crust.
- Baking sheet: Used for roasting garlic before incorporating it into the dough.
- Rubber spatula: Ideal for mixing sticky dough without overworking it.
Ingredients
For the Bread Dough
- 1 head garlic
- Extra-virgin olive oil
- Coarse sea salt and freshly ground black pepper
- 1½ cups water, room temperature (at or near 70°F/21°C)
- 1 teaspoon active dry yeast
- 3 cups bread or all-purpose flour, plus more for dusting
- ½ teaspoon dried oregano
- 1 teaspoon kosher or fine sea salt
- 2 teaspoons finely chopped rosemary (plus more to sprinkle across the top)
- 1 whole head roasted garlic (smashed)
- 1 tablespoon extra-virgin olive oil
How to Make Rosemary and Roasted Garlic Artisan Bread
Step 1: Roast the Garlic
Slice the garlic head in half. Drizzle the exposed cloves with olive oil and season with salt and pepper. Wrap in foil and roast on a baking sheet at 400ºF (204ºC) for 40 minutes. Let cool, then remove cloves from their skins and set aside.
Step 2: Prepare the Dough
When you’re ready to bake, sprinkle the yeast over the water and let it sit for 10-15 minutes. In a large bowl, stir together flour, oregano, salt, and rosemary; set aside.
Step 3: Mix Ingredients
Add the yeast mixture, roasted garlic, and olive oil to the bowl. Use a rubber spatula to mix until combined. The dough will be sticky with some flour still around the edges.
Step 4: Let It Rise
Cover the bowl with plastic wrap or a clean towel. Let rise somewhere warm until doubled in size, about 8-10 hours.
Step 5: Shape the Dough
Once risen, pull the dough onto a floured surface using your hands or a dough scraper. Gently fold several times until you form a soft ball. Place seam side up in a floured bowl. Dust with flour, cover, and refrigerate overnight or up to 48 hours.
Step 6: Preheat Your Oven
When ready to bake your bread, preheat your oven to 450ºF (232ºC) with your Dutch oven inside.
Step 7: Prepare for Baking
Uncover and invert the bowl to turn out the dough onto a lightly floured surface seam side down. Shape gently into a loaf on parchment paper; score the top with a sharp knife.
Step 8: Bake Your Bread
Remove the hot Dutch oven from the oven. Carefully transfer your dough (still on parchment) into it. Cover and bake for 30 minutes; then remove cover and bake for an additional 15 minutes until golden brown.
Step 9: Cool Before Slicing
Using parchment edges, lift bread from Dutch oven onto a wire cooling rack. Allow cooling for up to an hour before slicing.
Enjoy this delectable Rosemary and Roasted Garlic Artisan Bread at your next meal!
How to Serve Rosemary and Roasted Garlic Artisan Bread
This delicious Rosemary and Roasted Garlic Artisan Bread can elevate any meal. Its crusty exterior and soft, flavorful interior make it a versatile option for various occasions. Here are some serving suggestions to enjoy this fantastic loaf.
As a Standalone Snack
- Serve slices of the bread warm with a drizzle of extra-virgin olive oil for a simple yet satisfying snack.
- Pair it with flavored butters or spreads, like herb-infused butter or roasted red pepper spread, for added taste.
With Soups and Stews
- Enjoy this artisan bread alongside hearty soups like minestrone or tomato basil soup, as its crust can soak up delicious broth.
- Serve with rich stews such as beef bourguignon, where the bread acts as a perfect vehicle for the flavorful sauce.
In Sandwiches
- Use slices of the Rosemary and Roasted Garlic Artisan Bread to create gourmet sandwiches filled with fresh ingredients like turkey, arugula, and Brie cheese.
- Make a vegetarian option by layering grilled vegetables, hummus, and fresh herbs between two slices.
As Part of a Cheese Board
- Include this artisan bread on your cheese board alongside various cheeses, olives, and cured meats for an elegant appetizer.
- Pair it with honey or fig jam to contrast its savory flavors with sweetness.
Toasted with Toppings
- Slice the bread and toast it lightly before topping it with avocado, salt, and pepper for a delightful brunch item.
- Create bruschetta by topping toasted slices with diced tomatoes, basil, and balsamic glaze.
How to Perfect Rosemary and Roasted Garlic Artisan Bread
Perfecting your Rosemary and Roasted Garlic Artisan Bread takes practice. Follow these tips to ensure great results every time.
- Use quality ingredients: Opt for high-quality flour and fresh rosemary to enhance the flavor of your bread.
- Monitor dough hydration: A wetter dough results in a more open crumb structure; adjust water according to humidity levels in your kitchen.
- Allow adequate rising time: Don’t rush the fermentation process; longer rising times develop better flavor and texture.
- Preheat your oven thoroughly: Ensure your Dutch oven is heated properly before baking to achieve that perfect crust.
- Experiment with flavors: Try adding different herbs or spices to customize your loaf. Thyme or sage can bring new tastes to the bread.
- Store properly: Keep leftover bread in a paper bag at room temperature or freeze slices wrapped tightly to maintain freshness.
Best Side Dishes for Rosemary and Roasted Garlic Artisan Bread
Complementing your Rosemary and Roasted Garlic Artisan Bread with side dishes can enhance your meal experience. Here are some excellent options:
- Classic Caesar Salad: Crisp romaine lettuce tossed in Caesar dressing adds crunch that pairs beautifully with the soft bread.
- Roasted Vegetable Medley: Seasonal vegetables roasted until caramelized provide both color and nutrition alongside the artisan loaf.
- Marinated Olives: A selection of marinated olives brings a salty contrast that elevates the overall flavor profile of any dish.
- Caprese Salad: Fresh mozzarella, ripe tomatoes, and basil drizzled with balsamic vinegar create a refreshing accompaniment.
- Spicy Chickpea Stew: This hearty stew offers warmth and spice that complements the herby notes of the artisan bread nicely.
- Vegetable Soup: A light vegetable soup is perfect for dipping while enjoying slices of rosemary-flavored bread.
- Stuffed Peppers: Colorful bell peppers stuffed with quinoa or rice add protein while balancing out the meal’s flavors.
- Garlic Butter Shrimp: Juicy shrimp sautéed in garlic butter pair well as a seafood option next to this aromatic artisan bread.
Common Mistakes to Avoid
Baking artisan bread can be tricky. Here are some common mistakes to watch out for while making Rosemary and Roasted Garlic Artisan Bread:
- Ignoring the dough’s rise time: Allowing the dough to rise for the full 8-10 hours is crucial. Skipping this step can result in dense bread.
- Not using enough flour for dusting: Failing to dust your work surface can lead to sticky dough, making it difficult to shape your loaf. Always have extra flour on hand.
- Skipping the scoring step: Scoring the top of the loaf allows steam to escape during baking. Without it, your bread may crack unpredictably.
- Using cold water: Room temperature water is essential for activating yeast properly. Cold water can slow down the yeast’s activity, affecting your bread’s rise.
- Overbaking or underbaking: Keep an eye on baking times. Overbaked bread will be dry while underbaked bread will be gummy inside. Tap the crust; it should sound hollow when done.
Storage & Reheating Instructions
Refrigerator Storage
- Store in an airtight container or wrap tightly in plastic wrap.
- Keeps fresh for up to 3 days in the refrigerator.
Freezing Rosemary and Roasted Garlic Artisan Bread
- Wrap tightly in aluminum foil or freezer-safe plastic bags.
- Can be frozen for up to 3 months.
Reheating Rosemary and Roasted Garlic Artisan Bread
- Oven: Preheat to 350°F (175°C) and bake for about 10 minutes until warmed through.
- Microwave: Heat slices on a microwave-safe plate for about 15-20 seconds each. Be cautious not to overheat, as this can make the bread tough.
- Stovetop: Warm slices in a skillet over low heat, flipping occasionally until heated through.
Frequently Asked Questions
Here are some frequently asked questions about Rosemary and Roasted Garlic Artisan Bread:
Can I modify the recipe for different herbs?
Absolutely! You can substitute rosemary with other herbs like thyme or basil for a different flavor profile.
How do I know when my bread is done baking?
Your bread is done when it has a golden-brown crust and sounds hollow when tapped on the bottom.
What can I serve with Rosemary and Roasted Garlic Artisan Bread?
This artisan bread pairs beautifully with soups, salads, or simply with olive oil and balsamic vinegar for dipping.
Can I use whole wheat flour instead?
Yes, you can replace some of the all-purpose flour with whole wheat flour, but keep in mind that it may change the texture slightly.
How do I make my own roasted garlic?
Roast whole garlic heads wrapped in foil at 400°F (204°C) for about 40 minutes until soft and caramelized.
Final Thoughts
Rosemary and Roasted Garlic Artisan Bread is not only delicious but also versatile. You can enjoy it as a side dish or use it as a base for sandwiches. Feel free to customize by adding different herbs or spices according to your taste preferences!
Rosemary and Roasted Garlic Artisan Bread
Rosemary and Roasted Garlic Artisan Bread is a delightful homemade loaf that combines the robust flavors of fresh rosemary with the sweet, mellow richness of roasted garlic. This no-knead bread is perfect for any occasion—whether you’re serving it warm at dinner or using it as a base for gourmet sandwiches. With a crusty exterior and a soft, chewy interior, this artisan bread will fill your kitchen with an irresistible aroma that entices everyone around. It’s easy to make, requiring minimal effort in preparation while providing impressive results.
- Prep Time: 20 minutes
- Cook Time: 45 minutes
- Total Time: 1 hour 5 minutes
- Yield: Approximately 8 servings 1x
- Category: Bread
- Method: Baking
- Cuisine: Mediterranean
Ingredients
- 1 head garlic
- Extra-virgin olive oil
- Coarse sea salt and freshly ground black pepper
- 1½ cups water (room temperature)
- 1 teaspoon active dry yeast
- 3 cups bread or all-purpose flour
- ½ teaspoon dried oregano
- 1 teaspoon kosher or fine sea salt
- 2 teaspoons finely chopped rosemary (plus more for topping)
Instructions
- Roast the garlic by slicing the head in half, drizzling with olive oil, seasoning with salt and pepper, wrapping in foil, and baking at 400°F for about 40 minutes. Allow to cool before removing the cloves from their skins.
- In a bowl, combine room temperature water and yeast; let sit for 10–15 minutes. In another bowl, mix flour, oregano, salt, and rosemary.
- Combine yeast mixture with flour mixture, roasted garlic, and olive oil using a rubber spatula until just mixed. The dough should be sticky.
- Cover and let rise in a warm place until doubled (8–10 hours).
- After rising, shape the dough gently into a ball on a floured surface and refrigerate overnight or up to 48 hours.
- Preheat oven to 450°F with a Dutch oven inside.
- Remove dough from fridge, place on parchment paper seam side down, score the top with a knife, then transfer into the hot Dutch oven.
- Bake covered for 30 minutes; uncover and bake for an additional 15 minutes until golden brown.
- Cool on a wire rack before slicing.
Nutrition
- Serving Size: 1 slice (60g)
- Calories: 155
- Sugar: 0g
- Sodium: 360mg
- Fat: 4g
- Saturated Fat: 0.5g
- Unsaturated Fat: 3g
- Trans Fat: 0g
- Carbohydrates: 27g
- Fiber: 1g
- Protein: 4g
- Cholesterol: 0mg

Leave a Comment