I first stumbled upon the idea of Dill Pickle Bread while visiting a quirky little café that had a reputation for its unique flavor combinations. As soon as I took a bite, I was hooked—there was something so delightful about the tangy burst of dill pickles enveloped in soft, warm bread. I couldn’t shake the craving, but let’s be honest, I didn’t want to shell out for a slice every time I got that itch. Plus, isn’t there something magical about recreating a dish at home? I was determined to make this Dill Pickle Bread Recipe my own!
After what felt like an eternity (okay, it was more like five attempts), I finally nailed it down. Each try revealed new flavors and textures; at one point, my kitchen resembled a pickle-themed science lab gone rogue! My goal was simple: to perfect that balance of savory dill pickle goodness and soft, fluffy bread without turning it into a soggy mess. Spoiler alert: there were definitely some soggy moments along the way—trust me when I say my friends have never been so keen on bringing their own bread to dinner parties!
But oh boy, was it worth it! The final result is a loaf that’s not just unique and flavorful but also perfectly moist with a crust that has just the right amount of crunch. It’s ideal for sandwiches, or even just slathered with butter for that quick snack. With each bite, you’re met with an irresistible blend of dill-infused delight that’ll have you reaching for another slice before you know it. So grab your apron and let’s get baking—this Dill Pickle Bread Recipe is one you won’t want to miss!
These Dill Pickle Bread are…
….the ultimate game-changer for your bread basket!
1. They deliver a tangy flavor explosion that’s truly irresistible, thanks to the addition of chopped dill pickles and fresh or dried dill. This unique combination infuses the bread with a delightful tartness that elevates it beyond ordinary breads, making every bite a culinary adventure.
2. Incredible texture – a perfect balance of soft, fluffy insides with a slightly crisp crust. The use of all-purpose flour paired with baking powder and baking soda creates that airy lift while ensuring the exterior has just the right amount of crunch to complement the moist center.
3. The methodical mixing technique is key to achieving even texture throughout the loaf. By carefully combining dry ingredients with wet ones, I found that this method ensures that every slice maintains its structure without being dense, resulting in a perfectly baked Dill Pickle Bread Recipe.
4. Exceptional value – this homemade bread is not only cost-effective but also incredibly easy to make from scratch. With simple pantry staples like flour and baking powder, you can whip up a batch for a fraction of the price you’d pay at specialty bakeries, plus it’s ready in under an hour!
PS This recipe yields one delicious loaf, perfect for sandwiches or served alongside your favorite dishes!
Ingredients You’ll Need
Each ingredient in this dish plays an essential role in flavor and texture. Here’s what you’ll need:
2 cups all-purpose flour: Provides the structure and body for the bread.
1 tablespoon baking powder: Helps the bread rise and become fluffy.
1 teaspoon baking soda: Works alongside the buttermilk for leavening.
1 teaspoon salt: Enhances the overall flavor of the bread.
1 cup buttermilk (or milk with vinegar): Adds moisture and a slight tanginess.
1 large egg: Binds the ingredients together and adds richness.
1 cup dill pickles (chopped): Infuses the bread with a delightful tangy crunch.
1 tablespoon dill (fresh or dried): Boosts the pickle flavor for a fragrant aroma.
1 cup shredded cheese (cheddar or your choice): Adds creaminess and savory depth (optional).
1 tablespoon pickled jalapeños (for a spicy kick): Introduces a zesty heat for those who dare (optional).
You Must Grease the Loaf Pan. No Shortcuts!
I’ll admit it—I tried to skip greasing the loaf pan once, thinking it wouldn’t be a big deal. Spoiler alert: I was wrong! The bread stuck like it was auditioning for a horror movie, and let’s just say my cleanup was more dramatic than I anticipated. So, trust me when I say, do not skip this step!
Greasing the loaf pan is crucial because it ensures your Dill Pickle Bread releases easily once baked. Just like how a non-stick skillet makes cooking eggs a breeze, greasing the pan gives your bread that perfect crust and prevents any potential sticking disasters. This simple act sets the stage for a beautifully baked loaf every time.
What does greasing the loaf pan do?
- Easier Release — Greasing creates a barrier between the batter and the pan, allowing for a seamless release without tearing.
- Even Browning — A well-greased surface helps promote even browning on all sides of the bread, enhancing its visual appeal.
- Crispier Crust — When you grease the pan, it contributes to a crispier crust that contrasts beautifully with the soft interior of the bread.
- Minimized Sticking Risk — This technique dramatically reduces the chance of your bread clinging to the sides of the pan, which can ruin its delightful shape.
- Better Texture — A properly greased loaf will have a more tender crust, creating a pleasant contrast to its fluffy interior.
Different greasing methods
- Butter (⭐️) — Classic choice; adds flavor while ensuring easy release.
- Oil (⭐️) — Works well too but may leave a slightly greasier finish compared to butter.
- Baking Spray (⭐️⭐️) — Convenient and effective; just be sure to coat evenly for best results.
- Parchment Paper (⭐️⭐️⭐️) — For ultra-easy release; line bottom and sides of the pan if you want to play it safe!
Don’t underestimate this step! The most common mistake is thinking that just a quick wipe with oil or butter will suffice. You need to ensure every inch of that loaf pan is covered thoroughly—otherwise, you’re asking for trouble with stuck bread and heartbreak!
How to make Dill Pickle Bread
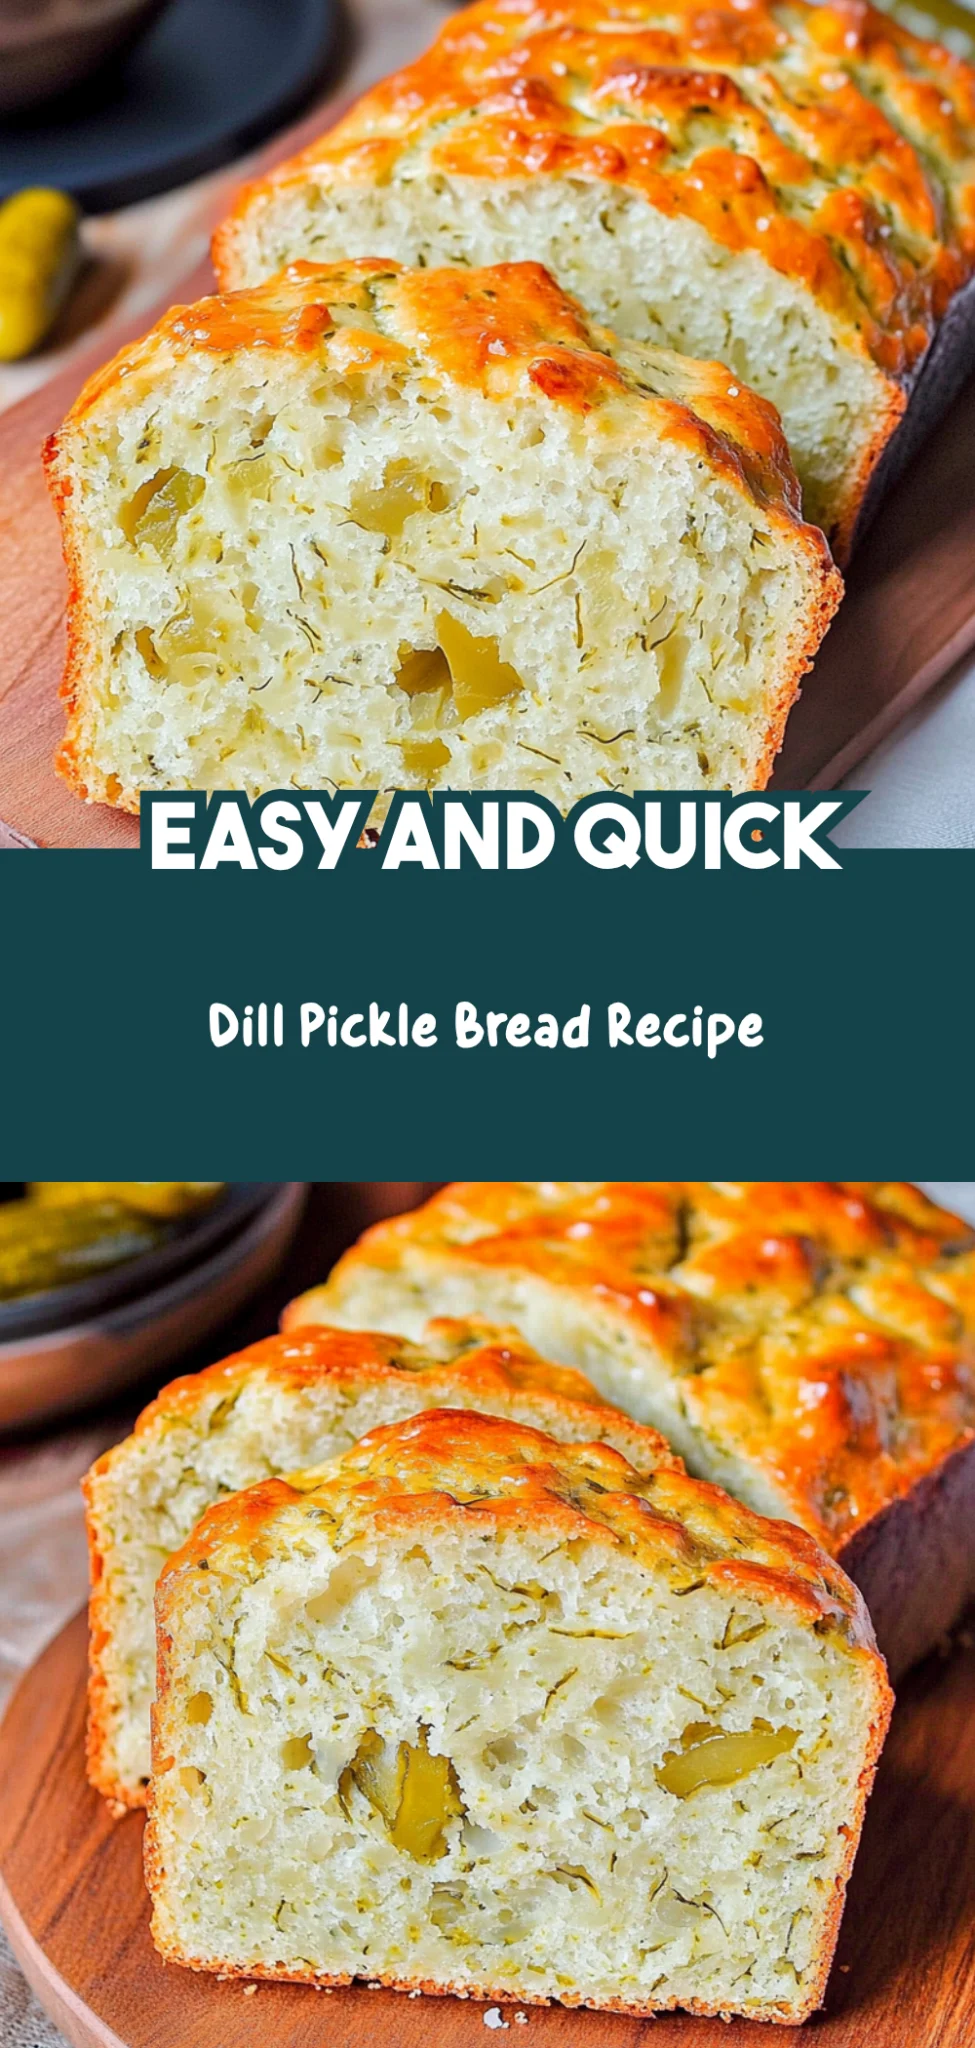
Are you ready to see how straightforward it is to make the Dill Pickle Bread of your dreams??
1. PREPARE THE OVEN AND PAN
First things first, let’s get that oven ready and your loaf pan greased!
1. Preheat – Preheat the oven to 350°F (175°C). This temperature is perfect for baking our bread evenly, giving it a nice golden crust.
2. Grease – Grease a loaf pan thoroughly with butter or cooking spray to ensure the bread releases easily after baking.
HANDY TIPS
- Use parchment paper for easier removal! You can line the bottom of the pan with parchment paper before greasing it.
- A metal pan works best for even browning, but glass or ceramic pans can be used too — just note they may require slightly longer baking time.
2. MIX DRY INGREDIENTS
Now, let’s prepare our dry mix to create the perfect base for our flavorful bread.
1. Whisk – In a mixing bowl, whisk together the flour, baking powder, baking soda, and salt until well combined. This step ensures even distribution of all leavening agents so your bread rises beautifully!
HANDY TIPS
- For added flavor, consider using a bit of garlic powder or onion powder in your dry mix.
- Sifting the flour can help incorporate air and make your bread lighter—though it’s not necessary.
3. COMBINE WET INGREDIENTS
Time to bring in the wet ingredients that will add moisture and flavor to our bread!
1. Mix – In another bowl, mix together the buttermilk (or milk with vinegar), egg, chopped dill pickles, and dill until well combined. The acidity from the buttermilk helps activate the baking soda for a fluffier texture!
HANDY TIPS
- If you want a more pronounced pickle flavor, consider using pickle juice instead of some of the buttermilk.
- Make sure your ingredients are at room temperature for better incorporation.
4. COMBINE MIXTURES
Let’s bring it all together into one delicious batter!
1. Pour – Pour the wet ingredients into the dry ingredients and stir gently until just combined. Be careful not to overmix; we want a tender loaf!
2. Fold – If you’re using optional add-ins like cheese or jalapeños, fold them in gently now. These additions give an extra burst of flavor and texture!
HANDY TIPS
- For a cheesy twist that really complements the pickles, sharp cheddar works wonders!
- If adding jalapeños, consider adjusting quantity based on your heat preference—start small if you’re unsure!
5. BAKE THE BREAD
It’s almost time to enjoy this delightful creation!
1. Pour – Pour the batter into your prepared loaf pan and smooth out the top with a spatula.
2. Bake – Bake for about 45 minutes or until a toothpick inserted in the center comes out clean. The top should be golden brown and fragrant as it bakes!
HANDY TIPS
- If you notice excessive browning before it’s fully baked, cover it loosely with aluminum foil until done.
- For an extra touch, sprinkle some cheese on top during the last 10 minutes of baking!
6. COOL AND SERVE
The final step brings us closer to tasting this unique bread!
1. Cool – Let the bread cool in the pan for about 10 minutes before transferring it to a wire rack to cool completely before slicing. This resting period helps set its structure while keeping it moist inside.
That’s it! You’ve created a deliciously unique Dill Pickle Bread that’s sure to impress! Make these once, and I wager they will invade your dreams every night too! – Nagi x
FAQ – Dill Pickle Bread
🥒 How long will Dill Pickle Bread keep?
Dill Pickle Bread can be stored at room temperature for up to 3 days. After that, the quality starts to decline significantly — I’d say it’s about 90% as good on day 4, and only 70% as good by day 5. To maximize freshness, keep it wrapped in plastic wrap or in an airtight container. If you want to extend its life, consider refrigerating it, where it can last for up to a week, but be aware that refrigeration may alter its texture slightly.
⏰ Can I skip letting the bread cool before slicing?
No, you cannot skip this step! I’ve tested this countless times and found that if you slice the bread too soon, it can become gummy and lose its perfect texture. Allowing it to cool for at least 10 minutes in the pan helps set the structure, making for cleaner slices and preventing crumbly disasters. Trust me — patience is a virtue in baking!
❄️ Can I freeze Dill Pickle Bread?
Absolutely! This bread freezes beautifully. Once it’s completely cooled, wrap it tightly in plastic wrap and then in aluminum foil or place it in a freezer-safe bag. It can be frozen for up to 3 months. To thaw, simply leave it at room temperature for several hours or overnight in the fridge. You can also pop slices directly into the toaster if you’re feeling impatient — they’ll toast up beautifully!
🌾 Can I make this bread gluten-free?
Yes! You can substitute all-purpose flour with a gluten-free flour blend that measures cup-for-cup. However, I recommend adding an additional tablespoon of baking powder if you’re using gluten-free flour to help with rise and texture. Just note that while the flavor will still be delightful, the texture might differ slightly from traditional wheat-based bread.
🧀 What can I use instead of dill pickles?
If you’re not a fan of dill pickles (I know, shocking!), you could try using sweet pickles for a sweeter twist or even sour cucumbers for a more tangy flavor. Alternatively, chopped olives or roasted red peppers could add a unique Mediterranean flair! Just remember that any substitution will change the overall taste profile.
🔍 Why do we mix dry ingredients separately before combining them with wet ingredients?
Mixing dry ingredients separately ensures even distribution of leavening agents like baking powder and baking soda throughout the flour. This step helps prevent any pockets of baking soda from causing uneven rising or off-flavors. In my experience testing recipes, skipping this step often leads to inconsistent results — so don’t skip it!
💡 Can I add other flavors or ingredients to the bread?
Definitely! This bread is super versatile! You can fold in 1 cup of shredded cheese like cheddar for added richness or toss in some pickled jalapeños for a spicy kick—my personal favorite! Additionally, you could experiment with herbs like thyme or oregano to give it an entirely new flavor profile. The possibilities are endless; just remember not to overload the batter too much!
Troubleshooting
I will continue to add more to this Troubleshooting section as I start seeing questions coming through from people who have made the recipe.
Troubleshooting tips
“My bread came out too dense! 😩”
- You might have overmixed the batter after combining the wet and dry ingredients. Mixing too much can develop gluten, making the bread dense rather than light and fluffy.
- If you used too much flour, it can also lead to a denser texture. Make sure you’re using the correct amount, and level off your measuring cups for precision.
I bet it was still YUM though!
“The top of my bread cracked while baking! 😱”
- This could be due to oven temperature being too high or not preheating properly. Always ensure your oven is at 350°F (175°C) before placing the loaf inside.
- If your batter was too thick, it may not rise evenly, leading to cracking on top. Ensure you are following the liquid measurements closely for a smooth batter.
I bet it was still YUM though!
“My bread turned out too wet in the middle! 😬”
- If you didn’t bake it long enough, the center may not set properly. Make sure to bake for the full 45 minutes or until a toothpick comes out clean.
- Using too many chopped dill pickles can also add excess moisture to your bread. Stick to one cup as indicated in the recipe for best results.
I bet it was still YUM though!
“The color of my bread is uneven! 🤔”
- If you greased your loaf pan unevenly, this can cause portions of your bread to brown more than others. Ensure a thorough greasing of the pan for even baking.
- Also, if you opened the oven door during baking, this can lead to uneven heat distribution, affecting how evenly your bread browns. Try to resist peeking until it’s almost done!
I bet it was still YUM though!
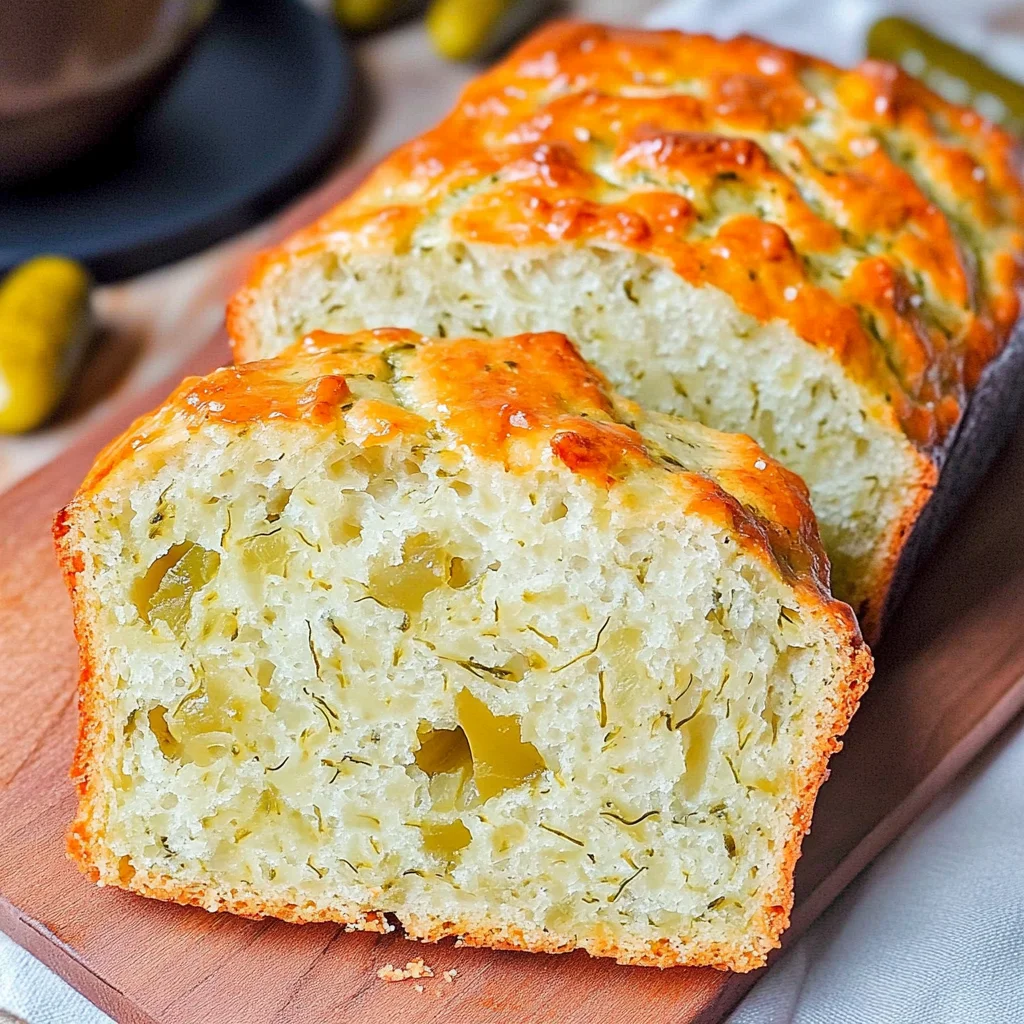
Dill Pickle Bread
Ingredients
Method
- Preheat the oven to 350°F (175°C). Grease a loaf pan.
- In a mixing bowl, whisk together the flour, baking powder, baking soda, and salt.
- In another bowl, mix the buttermilk, egg, chopped dill pickles, and dill until well combined.
- Pour the wet ingredients into the dry ingredients and stir until just combined. If using, fold in cheese and jalapeños.
- Pour the batter into the prepared loaf pan and smooth the top. Bake for 45 minutes or until a toothpick inserted in the center comes out clean.
- Let the bread cool in the pan for 10 minutes, then transfer to a wire rack to cool completely before slicing.
Leave a Comment