I’ve always had a soft spot for the classic Big Mac—it’s like a guilty pleasure that takes me back to carefree days at the drive-thru. Recently, I found myself craving those iconic flavors but in a way that didn’t involve a long wait or questionable ingredients. That’s when I decided to create my own version at home, a deconstructed masterpiece that captures all the magic of a Big Mac but in a bowl—hello, Big Mac Bowls! Not only did I want to satisfy my craving, but I also aimed to make it healthier and more budget-friendly without sacrificing any of the deliciousness.
Let me tell you, perfecting this recipe was quite the adventure! I lost count of how many times I tried to nail down the ideal blend of flavors and textures—let’s just say my kitchen looked like a war zone by attempt number five. Each iteration brought its own set of challenges; one time the sauce was too tangy, another the patties were overcooked. But with each failed attempt, I learned something new and got ever closer to that perfect balance of savory, creamy, and crunchy that we all love about a Big Mac.
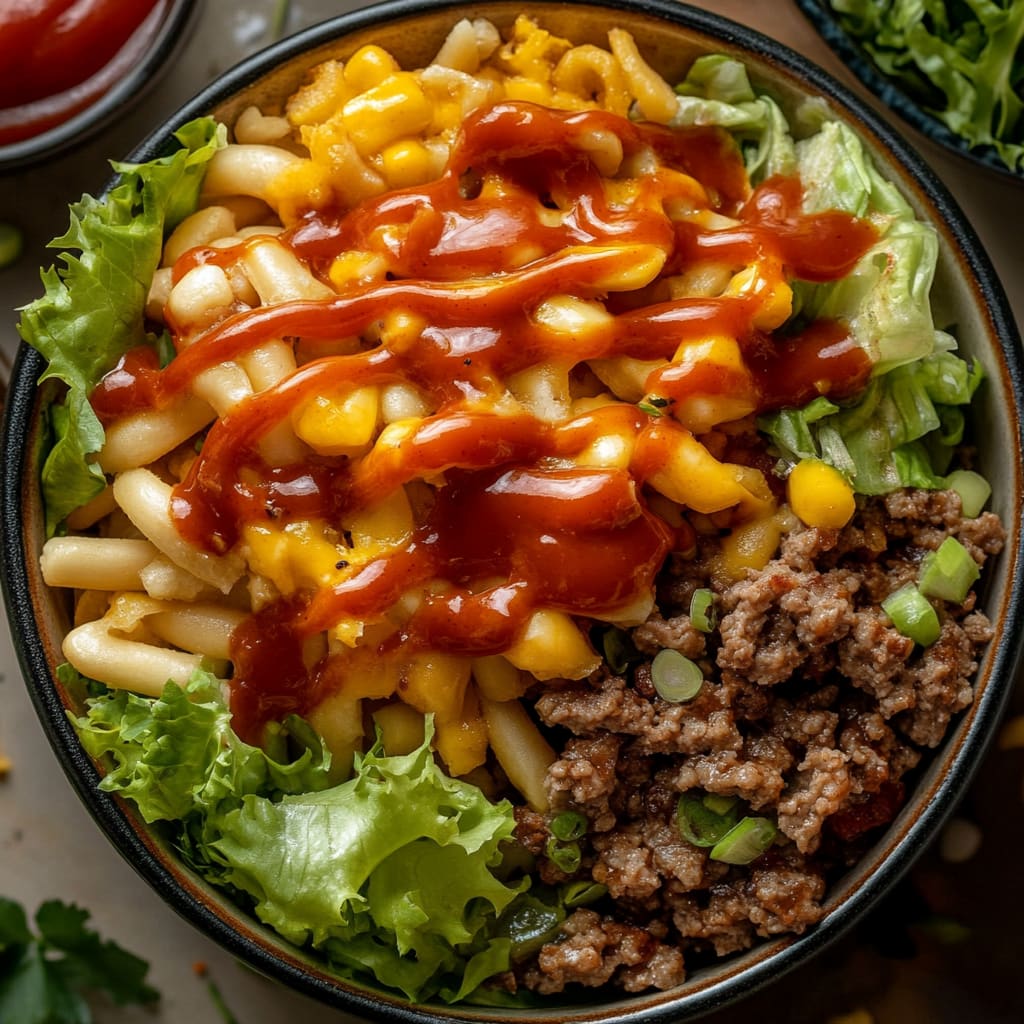
And oh boy, was it worth every chaotic moment! The final result is nothing short of sensational: tender beef patties nestled among crisp lettuce, sharp cheddar cheese, and that creamy special sauce—all served in an easy-to-make bowl that’s as satisfying as it is delicious. With layers of flavor and textures that keep you coming back for more, these Big Mac Bowls are sure to impress anyone at your dinner table. So grab your ingredients and let’s get cooking—you’re gonna love this!
These Big Mac Bowls are….
…a mouthwatering tribute to the classic Big Mac that delivers all the iconic flavors in a delightful bowl!
1. They feature a bold flavor profile with perfectly seasoned ground beef enhanced by onion and garlic powder. This combination not only brings out the savory richness of the beef but also mimics that unmistakable Big Mac taste, making every bite a nostalgic experience.
2. Textural harmony is achieved with the crispness of romaine lettuce paired with the chewiness of brown rice. The contrast between the fresh, crunchy greens and hearty grains creates a satisfying base that elevates the overall eating experience.
3. I employed a simple cooking technique by browning the ground beef just right, which deepens its flavor while keeping it juicy. By using an 80/20 blend, I ensured that each bite remains tender without losing that satisfying bite characteristic of a good burger.
4. A budget-friendly value option – these Big Mac Bowls come together easily and use accessible ingredients that you likely have on hand. This means you can enjoy a hearty meal packed with flavor for a fraction of what you’d pay at a fast-food joint, all while customizing it to your taste.
PS These bowls serve 4 and can be easily adjusted for larger gatherings or meal prep throughout the week!
Ingredients for the Big Mac Bowls
Each ingredient in this dish plays an essential role in flavor and texture. Here’s what you’ll need:
- 2 cups Romaine Lettuce (Chopped): Provides a crisp, refreshing base that mimics the classic Big Mac experience.
- 1 cup Cooked Brown Rice (Or quinoa): Adds hearty texture and serves as a filling foundation for the bowl.
- 1 lb Ground Beef (80/20 blend): Delivers rich flavor and juicy bites that are essential to the Big Mac vibe.
- 1 tsp Onion Powder: Enhances the beef with subtle sweetness and depth of flavor.
- 1 tsp Garlic Powder: Infuses the mixture with savory notes that elevate the overall taste.
- 1 tsp Salt: Brings out all the flavors and balances the ingredients perfectly.
- 1 tsp Black Pepper: Adds a touch of warmth and spice to the beef mixture.
- 1 cup Shredded Cheddar Cheese: Melts beautifully on top, providing creamy richness and a familiar taste.
- 1 cup Pickles (Sliced): Introduces a tangy crunch that complements the savory elements beautifully.
- 1/2 cup Ketchup: Adds a sweet and tangy sauce that ties all the flavors together.
- 1/2 cup Mustard: Offers a zesty kick that enhances the classic burger flavor profile.
- 1/4 cup Mayonnaise (Optional): Contributes creaminess and helps to bind the flavors if desired.
You Must Brown the Beef. No Shortcuts!
I’ll be honest: I tried to find a shortcut with this step, hoping that maybe I could just toss in the spices and call it a day. Spoiler alert: it didn’t work. The difference between properly browned beef and hastily cooked meat is like night and day, and trust me, your Big Mac Bowls will suffer if you skip this crucial step.
When you brown the beef, you’re not just cooking it; you’re unlocking deep flavors through the Maillard reaction—think of it as the culinary equivalent of a sunrise lighting up a landscape. That rich, savory color and taste will elevate your bowl from basic to brilliant, enhancing every layer from the crispy romaine lettuce to the fluffy brown rice base.
What does browning the beef do?
- Flavor — Browning enhances the meat’s natural sugars and proteins, creating complex savory notes that simply can’t be replicated with seasoning alone.
- Texture — Proper browning results in a deliciously caramelized crust, giving your beef an appealing bite amidst the fresh crunch of romaine lettuce.
- Color — The golden-brown hue signals perfectly cooked meat, making your Big Mac Bowls visually appetizing and inviting.
- Juiciness — A well-browned beef retains moisture better as it cooks through, ensuring each bite is tender rather than dry.
- Aromatics — The aroma released during browning will make your kitchen smell irresistible, priming your taste buds for what’s to come!
Different browning times
- 3 minutes (good) — Just starting to brown; flavor is good but lacks depth.
- 5 minutes (better) — Developing some color and flavor; still not quite there yet.
- ⭐️ 7 minutes⭐️ — Perfectly browned! Rich flavor and great texture achieved.
- 10 minutes (overdone) — Possible dryness; flavors may become too intense or burnt.
Don’t even think about skipping or rushing this step! The most common mistake is undercooking the beef, which results in bland meat that detracts from all those delightful toppings. No one wants sad beef in their Big Mac Bowls!
How to make Big Mac Bowls
Are you ready to see how straightforward it is to make the Big Mac Bowls of your dreams??
1. PREPARE THE BEEF
Let’s start with that delicious beef mixture that gives these bowls their signature flavor!
1. BROWN – In a skillet over medium heat, add the ground beef. Cook until browned, breaking it apart with a spatula, about 5-7 minutes. You want the beef to be well-cooked and crumbly, giving it that perfect texture for your bowl.
2. SEASON – Add onion powder, garlic powder, salt, and black pepper. Stir well and cook for an additional 2-3 minutes until fragrant. This step is crucial because it infuses the beef with savory flavor that mimics the classic Big Mac taste! ❓ Why does seasoning at this stage matter? Because it allows the spices to meld into the beef as it cooks.
HANDY TIPS
- For extra flavor, consider using a mix of ground beef and ground turkey if you want to lighten things up without losing taste.
- If you prefer a bit of heat, add some chili powder or cayenne pepper during the seasoning phase!
2. ASSEMBLE THE BOWLS
Now comes the fun part—building your Big Mac Bowls!
3. LAYER – In a mixing bowl, layer the chopped romaine lettuce and cooked brown rice as the base. This crunchy and hearty foundation will hold everything together while providing that classic salad crunch! 💡 TIP: Using quinoa instead of brown rice adds a nutty flavor and boosts protein content!
4. TOP – Top with the cooked beef mixture, shredded cheddar cheese, sliced pickles, ketchup, mustard, and mayonnaise if desired. Feel free to customize these toppings based on your favorite Big Mac elements; perhaps some diced tomatoes or crispy onions could join in!
HANDY TIPS
- For meal prep, you can prepare the beef mixture ahead of time and store it in an airtight container in the fridge for up to 3 days.
- If you’re feeding a crowd, consider doubling the recipe—trust me, they’ll disappear fast!
3. SERVE
This is where all your hard work pays off—time to enjoy!
5. SERVE – Serve immediately while warm, and enjoy your Big Mac Bowls! The combination of flavors will have you reminiscing about classic fast food but in a healthier way. Plus, it’s ready in just 30 minutes!
Make these once, and I wager they will invade your dreams every night too! – Nagi x
FAQ – Big Mac Bowls
🍔 Can I make this recipe ahead of time?
Yes, you can absolutely prepare elements of the Big Mac Bowls ahead of time! I recommend cooking the beef mixture and storing it in an airtight container in the refrigerator for up to 3 days. The cooked brown rice (or quinoa) can also be made in advance and refrigerated. Just remember to keep the fresh toppings like romaine lettuce, cheese, pickles, ketchup, mustard, and mayonnaise separate until you’re ready to serve. Assembled bowls are best enjoyed right after they’re made to maintain freshness and crunch!
❄️ Can I freeze the leftovers?
You can freeze the beef mixture if you have leftovers! Just let it cool completely before transferring it to a freezer-safe bag or container. When properly stored, it will keep well for about 2-3 months. However, I wouldn’t recommend freezing the assembled bowls or fresh toppings as they lose their texture and flavor when thawed. To reheat, simply thaw in the refrigerator overnight and warm it on a skillet or microwave until heated through.
🌾 Can I make this recipe gluten-free?
Absolutely! To make Big Mac Bowls gluten-free, simply use gluten-free condiments for ketchup and mustard. Additionally, ensure that your beef seasoning doesn’t contain any hidden gluten ingredients. The base of chopped romaine lettuce and cooked brown rice is naturally gluten-free, so you’re all set there! You won’t miss out on any deliciousness with these adjustments.
🥩 What can I substitute for ground beef?
If you’re looking for a substitute for ground beef, there are several options you can try! Ground turkey or chicken works well if you want a leaner option; just be mindful that they might cook faster than beef—so keep an eye on them! Alternatively, if you’re looking for a vegetarian option, crumbled tempeh or lentils are great choices that will absorb flavors beautifully. I’ve tested all these alternatives, and they still deliver fantastic flavor!
⏲️ Why do I need to cook the beef mixture thoroughly?
Cooking the ground beef thoroughly is crucial for both safety and flavor. It takes approximately 5-7 minutes over medium heat until browned—this ensures that any potential harmful bacteria are killed off. Additionally, the seasoning really melds into the meat during this cooking process. Trust me; don’t skip this step! You want every mouthful to burst with flavor.
🔄 Can I customize my toppings?
Yes! One of the best things about Big Mac Bowls is how customizable they are. Feel free to add your favorite toppings such as diced tomatoes, sliced jalapeños for some heat, or avocado for creaminess. You could even swap out cheddar cheese for pepper jack if you like a little kick! Just remember to keep some classic elements like pickles and condiments to retain that iconic Big Mac flavor.
🧊 How long will these bowls last in the fridge?
When stored properly in an airtight container in the fridge, assembled Big Mac Bowls will last about 2 days. However, for optimal taste and texture—especially with lettuce—it’s best to eat them within 24 hours. After day 2, you’ll find that quality decreases significantly; I’d say around 70% as good by then. So enjoy them fresh while you can!
Troubleshooting
I will continue to add more to this Troubleshooting section as I start seeing questions coming through from people who have made the recipe.
Troubleshooting tips
“My beef mixture turned out too dry! 😭”
- This could be because you used a leaner blend of ground beef instead of the recommended 80/20 blend, which can result in less fat and moisture. The fat content is key for keeping the beef juicy.
- Alternatively, if you cooked the beef for too long, it may have lost its moisture during cooking. Make sure to stick to the 5-7 minutes until browned and watch it closely!
- I bet it was still YUM though!
“My lettuce got all soggy at the bottom! 😩”
- If your romaine lettuce is sitting on warm brown rice for too long before serving, it can release moisture and become soggy. Layer your ingredients right before serving to keep everything fresh.
- Also, if you added too much ketchup or mayonnaise, those sauces can also make the lettuce wet. Keep your toppings to a minimum until you’re ready to dig in!
- I bet they were still YUM though!
“My Big Mac Bowl looks like a pile of mush! 😳”
- This often happens if you overcooked the beef or mixed everything too vigorously when assembling. The beef should be crumbly and not pasty—break it apart well while cooking.
- If you’re using quinoa instead of brown rice, ensure it’s not overcooked either; that can lead to a mushy texture. Aim for fluffy grains for that perfect bowl!
- I bet it was still YUM though!
“The cheese didn’t melt properly on my beef! 🧀”
- If you didn’t let the hot beef sit on top of the cheese long enough, it won’t melt as desired. Just let the hot mixture rest for a minute or two on top of the cheese before serving.
- Alternatively, if your cheese was cold straight from the fridge, that might have prevented it from melting properly. Letting it sit at room temperature for a bit helps!
- I bet they were still YUM though!

Leave a Comment