I first stumbled upon the idea for these Apple Samoas during a late-night snack run at my favorite bakery. They had just released a limited edition dessert that combined caramelized apples with a coconut topping, and I was instantly hooked—it’s like they took everything good in life and packed it into one bite! However, as much as I adored those little gems, they were a bit pricey for my budget, and I couldn’t shake the thought that I could make something even better at home. So, armed with a vision and a craving that wouldn’t quit, I decided to take on the challenge of recreating this delightful treat.
Let me tell you, perfecting my Apple Samoas was no walk in the park—it took me four (yes, four!) attempts before I finally got it right. I tried everything from varying the sweetness of the apple filling to adjusting the coconut topping’s texture. There were moments when my kitchen looked like a coconut bomb exploded, and let’s just say that not every batch ended up Instagram-worthy! But with each flop came valuable lessons about balance and flavor, and eventually, I figured out how to marry the sweet apples with that irresistible coconut crunch.
And boy, was it worth all those trials! The final result is nothing short of magical—imagine biting into a crispy cookie base topped with a gooey apple filling that’s perfectly spiced and finished off with a chewy layer of toasted coconut. These Apple Samoas have an incredible blend of textures; they’re crunchy yet soft, sweet but not cloying. Trust me when I say you’ll want to share them with friends—but maybe keep a few for yourself because they’re just that good! Can’t wait for you to try them!
These Apple Samoas are….
….the ultimate indulgence that combines the comforting flavors of apple pie with a tropical coconut twist!
1. They deliver an irresistible flavor explosion from the combination of sweet apples and warm cinnamon. This delightful mix not only enhances the natural sweetness of the apples but also creates a cozy aroma that will fill your kitchen, making every bite taste like a hug in cookie form.
2. Expect an incredible texture that perfectly balances crispiness and chewiness. The cookie base, made from softened butter and a touch of granulated sugar, forms a sturdy yet tender foundation, allowing for a satisfying crunch when you first bite into it followed by a soft, chewy middle that keeps you coming back for more.
3. The technique of mixing the apple filling elevates these cookies from ordinary to extraordinary. By tossing the diced apples with brown sugar and cinnamon beforehand, I ensure they release their juices while baking, creating a beautifully gooey interior that contrasts wonderfully with the crisp coconut topping.
4. They offer great value, as you can whip up a batch with simple pantry staples without breaking the bank. With just a handful of ingredients, including flour and butter, these Apple Samoas bring bakery-quality treats right to your home kitchen at a fraction of the cost!
PS These cookies are small-batch friendly, perfect for satisfying cravings without overwhelming your kitchen counters!
Ingredients for the Apple Samoas
Each ingredient in this dish plays an essential role in flavor and texture. Here’s what you’ll need:
- 1 cup all-purpose flour: Provides the structure for the cookie base.
- 1/2 cup unsalted butter (softened): Adds richness and ensures a tender texture.
- 1/4 cup granulated sugar: Sweetens the cookie base for a delightful balance.
- 1 large egg: Binds the ingredients together and adds moisture.
- 1/2 teaspoon vanilla extract: Enhances the overall flavor with a warm aroma.
- 2 medium apples (peeled and diced): Offers a sweet and juicy filling that complements the coconut.
- 1/4 cup brown sugar: Caramelizes slightly during baking, enriching the apple filling.
- 1 teaspoon cinnamon: Infuses warm spice notes that elevate the apple flavor.
- 1 tablespoon lemon juice: Brightens the filling and balances sweetness with acidity.
- 1 cup sweetened shredded coconut: Creates a chewy topping that mimics traditional Samoas.
- 1/4 cup chocolate chips (for drizzling): Adds a rich chocolatey finish to each cookie.
- 1 tablespoon coconut oil (melted): Helps to drizzle the chocolate smoothly and adds coconut flavor.
You MUST Cream the Butter and Sugar! No Shortcuts Here!
I’ll be honest: I thought I could skip creaming the butter and sugar for these Apple Samoas. I mean, who has time for that extra step, right? But after a few test batches of sad, flat cookies, I quickly learned my lesson—there’s just no way around this crucial technique if you want cookies that are light and tender!
So why is creaming so important? When you cream softened butter with sugar, you’re incorporating air into the mixture, which helps create a lighter texture in the final cookie. Think of it like blowing up a balloon; without that air, your cookie ends up dense and flat instead of fluffy and delightful. Trust me, you want those perfectly risen Apple Samoas!
What does creaming do?
- Texture — The incorporation of air creates a tender crumb that makes each bite light and airy.
- Rise — The cookies puff up beautifully in the oven, preventing them from spreading too much and ensuring they hold their shape.
- Even Baking — Creamed butter mixes more uniformly with flour, resulting in an even bake throughout the cookie base.
- Moisture Retention — The sugar draws moisture into the dough while baking, leading to a chewy interior that’s irresistible.
- Flavor Development — This technique enhances flavor as it allows for better distribution of sweetness and vanilla throughout the dough.
Different creaming times
- 20 seconds (average) — You’ll get a slightly denser cookie with less air incorporated; still tasty but not ideal.
- 1 minute (good) — Better than average; cookies will rise decently but may lack that signature fluffiness.
- 2 minutes (great) — Ideal; achieves a light and fluffy texture that’s perfect for these Apple Samoas.
- 3 minutes or more (best) — Maximum air incorporation; cookies will be ultra-light but be cautious not to overdo it as it can start separating.
If you skimp on creaming the butter and sugar, your cookies will end up sad and flat. Don’t let this happen to you! Take the time to cream them together properly for cookies that are worth every bite.
How to make Apple Samoas
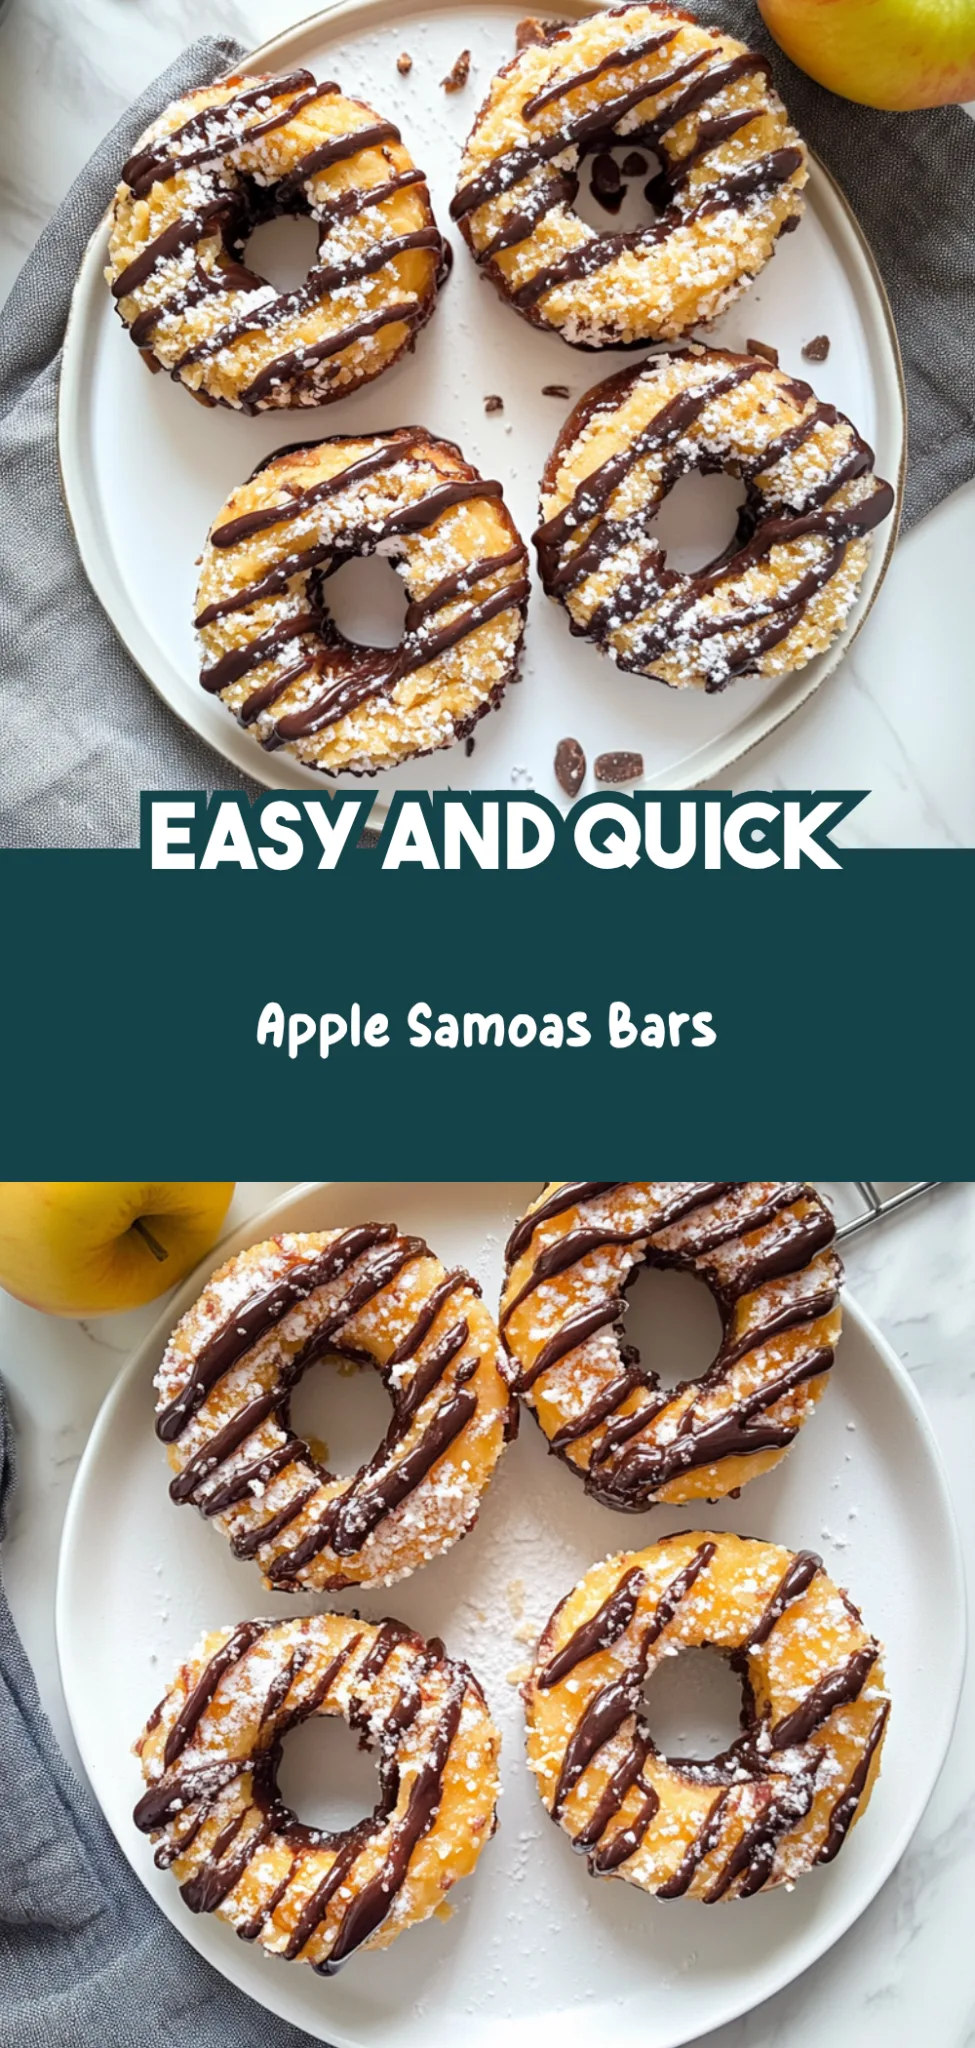
Are you ready to see how straightforward it is to make the Apple Samoas of your dreams??
1. PREPARE THE COOKIE BASE
Let’s get started on that buttery, sweet cookie base that will set the stage for our delicious Apple Samoas!
1. Preheat – Preheat your oven to 350°F (175°C) so it’s hot and ready for baking those cookies!
2. Cream – In a mixing bowl, cream together the softened butter and granulated sugar until light and fluffy. This step is crucial as it incorporates air into the mixture, which helps create a tender cookie.
3. Mix – Add in the egg and vanilla extract, mixing until well combined. Gradually add the flour and mix until a dough forms; this will give you that perfect consistency for rolling!
4. Shape – Roll the dough into small balls and place them on a baking sheet lined with parchment paper, flattening them slightly with your palm. This helps them bake evenly!
5. Bake – Bake for 10-12 minutes or until lightly golden. You want them to look invitingly golden brown! Remove from the oven and let cool.
HANDY TIPS
- 💡 TIP: If you want smaller cookies, roll them into smaller balls instead of discs; they work really well and just need an extra minute or two in the oven.
- ⚠️ Cooling — Letting them cool is key; if they’re too warm, the apple filling won’t sit well on top!
2. MAKE THE APPLE FILLING
Now we’re going to create a luscious apple filling that’s bursting with flavor!
5. Combine – In a saucepan over medium heat, combine the diced apples, brown sugar, cinnamon, and lemon juice. The combination of these ingredients creates a wonderful aroma that fills your kitchen!
6. Cook – Cook for about 5-7 minutes until the apples are tender but not mushy; you want them to hold their shape! Remove from heat and let cool.
HANDY TIPS
- 💡 TIP: Feel free to use different types of apples for varied sweetness levels—Granny Smith offers tartness while Honeycrisp adds natural sweetness!
- ❓ Why does this matter? Because combining flavors at this stage enhances the overall taste of your Apple Samoas!
3. ASSEMBLE THE SAMOAS
This is where all our hard work comes together in a beautiful assembly of flavors!
7. Spoon – Once the cookies have cooled, spoon a generous amount of the apple filling onto each cookie—don’t be shy here; more filling means more yumminess!
8. Mix – In a bowl, mix the shredded coconut with melted coconut oil until it’s well coated; this ensures even distribution over your cookies. Sprinkle this coconut mix over the apple filling generously!
9. Drizzle – Melt the chocolate chips in a microwave or double boiler until smooth, then drizzle over the top of each cookie using a fork or piping bag for an elegant touch!
10. Set – Allow the chocolate to set before serving—this will take just a few minutes but makes all the difference in presentation!
HANDY TIPS
- 💡 TIP: For an extra crunch, toast your shredded coconut lightly in advance before adding it on top!
- ⚠️ Drizzling — Be sure not to rush this step; letting everything set properly makes these treats irresistible!
Wrap up your culinary experience by savoring these delightful Apple Samoas—with buttery cookies, sweet apple filling, and crunchy coconut topping—it’s hard to believe you made something so delicious from scratch! Make these once, and I wager they will invade your dreams every night too! – Nagi x
FAQ – Apple Samoas
🍏 How long will these cookies keep?
These Apple Samoas can be stored in an airtight container at room temperature for up to 3 days, and they’ll still taste about 90% as good on day 4! After that, the cookie base may start to lose its freshness, becoming a bit softer. If you want them to last longer, you can refrigerate them for up to a week, but I recommend enjoying them fresh for the best texture and flavor.
⏱️ Can I make the dough ahead of time?
Yes, you can definitely make the cookie dough ahead of time! I recommend chilling the dough for about 30 minutes after mixing it, which helps it firm up and makes it easier to roll into balls. Once chilled, you can wrap it tightly in plastic wrap and store it in the fridge for up to 2 days. Just remember to let it sit at room temperature for about 10-15 minutes before rolling if it feels too hard.
❄️ Can I freeze these cookies?
Absolutely! To freeze your Apple Samoas, first bake them and let them cool completely. Then place them in a single layer on a baking sheet and freeze until solid. Once frozen, transfer them to an airtight container or zip-top bag. They will keep well in the freezer for up to 3 months. When you’re ready to enjoy them, simply thaw them at room temperature or pop them in the oven at a low temperature for a few minutes to revive their freshness.
🌾 Can these be made gluten free?
Yes, you can make these Apple Samoas gluten-free! Substitute the all-purpose flour with a 1: 1 gluten-free flour blend. I recommend using one that contains xanthan gum for better structure. However, keep in mind that while the texture might differ slightly from traditional flour, they will still be deliciously satisfying!
🍬 Can I reduce the sugar or substitute with sweeteners?
Nope! You cannot reduce the sugar in this recipe without affecting the overall structure and sweetness of the cookies. I’ve tried adjusting the sugar levels multiple times during testing, and I found that even slight reductions resulted in cookies that were less flavorful and didn’t hold together well. If you’re looking for a lower-calorie option, consider using a sugar substitute designed for baking (like erythritol) but expect variations in taste.
🤔 Why do I need to cream the butter and sugar until light and fluffy?
Creaming the butter and sugar is crucial because it incorporates air into your mixture, leading to a lighter and fluffier cookie base. This process also helps dissolve some of the sugar so that it’s evenly distributed throughout your dough. If you skip this step or don’t cream long enough—around 3-5 minutes—you’ll end up with denser cookies that might not rise as nicely when baked. Trust me; it’s worth taking the extra time!
🍏 What variations can I try with this recipe?
There are plenty of fun variations you can experiment with! Here are some ideas:
- Nut Add-ins: Chopped nuts like pecans or walnuts can add crunch.
- Spice Swaps: Try adding nutmeg or ginger along with cinnamon for a different flavor profile.
- Fruit Variations: Use pears or peaches instead of apples for a seasonal twist.
- Coconut Flavor Boost: Add coconut extract to enhance that coconut topping flavor even more!
I love trying new combinations; just remember—don’t overstuff those cookies! 😅
Troubleshooting
I will continue to add more to this Troubleshooting section as I start seeing questions coming through from people who have made the recipe.
Troubleshooting tips
“My cookies were too flat! 😩”
- You might not have rolled your dough into balls that are thick enough before baking. If they’re too small or flattened too much, they’ll spread out more during baking.
- Another culprit could be using melted butter instead of softened butter. Melted butter causes the dough to lose structure and spread too much as it bakes.
I bet they were still YUM though!
“My cookie base turned out dry and crumbly! 😟”
- This could happen if you added too much flour while measuring. Make sure to spoon the flour into your measuring cup and level it off instead of scooping directly from the bag.
- Overbaking can also dry them out. Keep an eye on them in the oven, as every oven is different— 10-12 minutes should get them lightly golden but not overdone!
I bet they were still YUM though!
“The tops of my cookies cracked! 😱”
- If your dough was overmixed after adding the flour, it can lead to a tougher texture which may crack while baking. Mix just until combined.
- Also, if your oven temperature is too high, it can cause the outer layer to cook faster than the inside, resulting in cracks. Ensure your oven is calibrated correctly at 350°F (175°C).
I bet they were still YUM though!
“My apples turned mushy and lost their shape! 🍏”
- Cooking them for too long in the saucepan could be the reason. Aim for just 5-7 minutes; you want them tender but still holding their shape.
- Using overly ripe apples can also lead to mushiness since they break down faster when cooked. Try using firmer varieties like Granny Smith for better results!
I bet they were still YUM though!
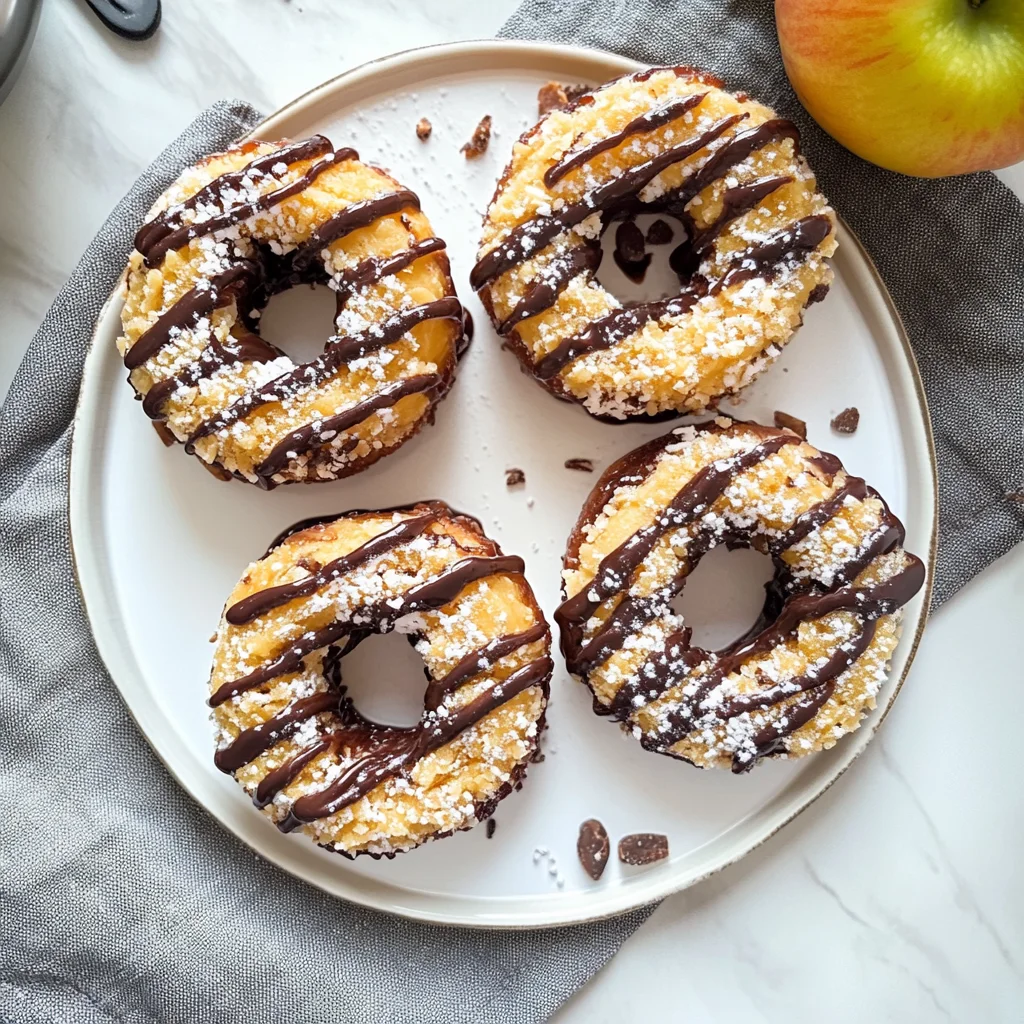
Apple Samoas
Ingredients
Method
- Preheat the oven to 350°F (175°C). In a mixing bowl, cream together the softened butter and granulated sugar until light and fluffy.
- Add the egg and vanilla extract, mixing until well combined. Gradually add the flour and mix until a dough forms.
- Roll the dough into small balls and place them on a baking sheet lined with parchment paper, flattening them slightly.
- Bake for 10-12 minutes or until lightly golden. Remove from the oven and let cool.
- In a saucepan over medium heat, combine the diced apples, brown sugar, cinnamon, and lemon juice.
- Cook for about 5-7 minutes until the apples are tender. Remove from heat and let cool.
- Once the cookies have cooled, spoon a generous amount of the apple filling onto each cookie.
- In a bowl, mix the shredded coconut with melted coconut oil. Sprinkle the coconut over the apple filling.
- Melt the chocolate chips and drizzle over the top of each cookie.
- Allow the chocolate to set before serving.

Leave a Comment