I first stumbled upon the idea of Red Velvet Brownies during a late-night dessert craving that struck me like a bolt of lightning. I was scrolling through social media and came across a picture of these stunning red velvet treats swirled with cream cheese, sitting in a cozy café I’d never visited. The combination of rich chocolatey goodness and that iconic red hue was just too tempting to resist! But let’s be honest, with my tight budget and the ever-present desire to whip up something delicious in my own kitchen, I knew I had to recreate them myself.
After what felt like a small eternity of trial and error—seriously, it took me seven attempts before I finally got it right—I can confidently say that my kitchen has never seen so much red food coloring or cream cheese! Each time, I was trying to find that perfect balance between fudgy texture and the signature tanginess of red velvet. Some batches were too dry, others too dense, and at one point, I even created brownies so sweet they could’ve doubled as candy! But each attempt brought me closer to the decadent treat I envisioned.
And oh boy, was it worth every failed attempt! These Red Velvet Brownies are pure magic—rich, moist, and decadently swirled with creamy cheese that will make your taste buds dance. They boast a perfect chewy texture with just the right amount of sweetness and a striking visual appeal that’s hard to resist. Trust me when I say you’re going to want to make these for every gathering (or just for yourself!). So grab those ingredients and let’s dive into this delightful adventure—you won’t regret it!
These Red Velvet Brownies are…
…the ultimate indulgence for dessert lovers, combining rich flavors and a creamy texture that’s simply irresistible!
1. They deliver a decadent chocolatey taste with a hint of vanilla and a touch of red velvet charm. The combination of unsweetened cocoa powder and granulated sugar creates a rich, sweet base that perfectly balances the slight tanginess of the cream cheese swirl, making each bite an exquisite delight.
2. Irresistibly chewy texture – these brownies strike that perfect balance between fudgy and chewy. The melted butter and eggs work together to create a moist brownie base, while the addition of all-purpose flour ensures just enough structure to hold the delightful cream cheese swirl on top.
3. A key technique for success is using melted butter instead of softened butter. This simple swap not only enhances the overall richness of the brownies but also allows for a smoother batter that blends beautifully with the dry ingredients, resulting in a more uniform texture throughout.
4. Incredible value – why settle for store-bought when you can whip up these gourmet-style Red Velvet Brownies at home? With simple ingredients like sugar, cocoa powder, and cream cheese, you can create an impressive dessert that rivals any bakery without breaking the bank.
PS These Red Velvet Brownies yield about 16 squares, perfect for sharing—or not! You might want to keep them all to yourself!
Ingredients for the Red Velvet Brownies
Each ingredient in this dish plays an essential role in flavor and texture. Here’s what you’ll need:
- 1 cup granulated sugar: Provides sweetness and helps create a moist texture.
- 1/2 cup unsalted butter (melted): Enriches the brownies with a rich, buttery flavor.
- 2 large eggs: Acts as a binder to give structure and moisture to the brownies.
- 1 teaspoon vanilla extract: Adds warmth and depth to enhance the overall flavor.
- 1 cup all-purpose flour: Forms the base structure for the brownies, ensuring they hold together.
- 1/4 cup cocoa powder (unsweetened): Infuses a rich chocolate flavor that complements the red velvet.
- 1/2 teaspoon baking powder: Provides leavening to create a soft and fudgy texture.
- 1/4 teaspoon salt: Balances sweetness and enhances other flavors in the brownies.
- 1 tablespoon red food coloring: Gives the brownies their signature vibrant red hue.
You Must Preheat the Oven — No Shortcuts!
I hate to be the bearer of bad news, but preheating the oven is non-negotiable for these Red Velvet Brownies. Trust me, I tried taking a shortcut and thought I could skip this step — only to end up with sad, undercooked brownies that were more gooey mess than delicious treat. I promise, you don’t want to go down that road!
So why is preheating so vital? Think of your brownies as a performance at the theater; they need the right environment to shine! When you place your brownie batter into a fully preheated oven, it starts cooking immediately and sets the structure from the get-go. This ensures that your sugar and butter meld beautifully, creating that rich texture we love while also allowing those vibrant red colors to pop perfectly.
What does preheating do?
- Texture: Ensures a firm crust on top while keeping the center fudgy, achieving that perfect brownie balance.
- Rise: Proper oven temperature allows the brownies to rise correctly without collapsing during baking.
- Flavor development: The initial heat helps caramelize sugars, enhancing sweetness and depth in flavor.
- Color: A hot oven helps achieve that beautiful deep red hue by activating the food coloring effectively.
- Moisture retention: Starting off in a hot environment locks in moisture for a soft center rather than a dry brownie.
Different preheating times
- 0 minutes (poor) — If you throw your batter into a cold oven, expect uneven baking and gummy centers.
- 5 minutes (fair) — Better than nothing! However, you might still have pockets that are undercooked.
- 10 minutes (good) — A solid start; most brownies will bake up nicely but may lack optimal texture.
- ⭐️ 15 minutes⭐️ — Best practice! Your brownies will rise beautifully and have an ideal crumb structure.
- Beyond 20 minutes — Risk of overheating; browning too much before baking through properly.
Don’t even think about skipping this step! The most common mistake is being impatient with preheating. If the oven isn’t hot enough when you add your brownie batter, you’ll end up with dense, unappetizing treats instead of those decadent red velvet brownies you’re dreaming of.
How to make Red Velvet Brownies
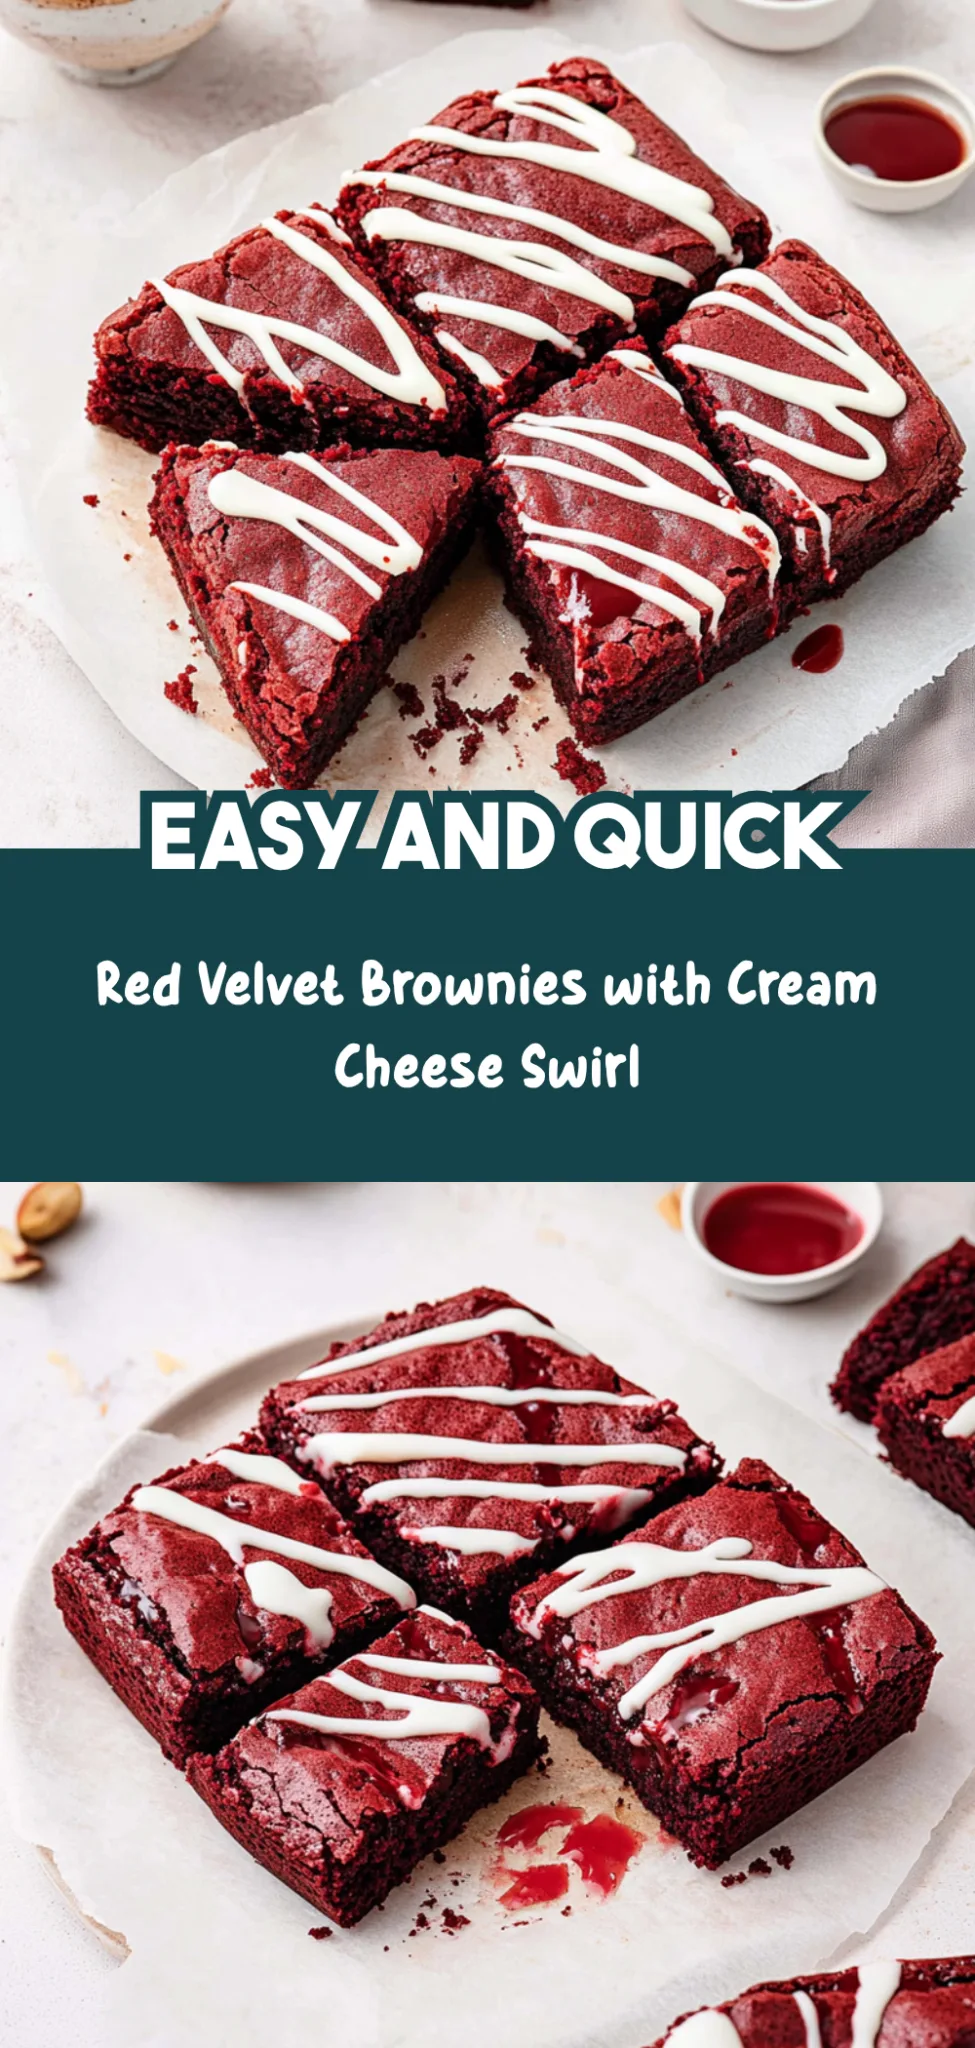
Are you ready to see how straightforward it is to make the Red Velvet Brownies of your dreams??
1. PREPARE THE OVEN AND PAN
Let’s get things started by getting your oven ready for these delicious brownies!
Preheat – Preheat the oven to 350°F (175°C). This ensures that your brownies bake evenly and perfectly.
Line – Line a 9×9 inch baking pan with parchment paper, leaving some overhang on the sides. This will make it super easy to lift the brownies out of the pan later!
HANDY TIPS
- Use a light-colored metal pan for even baking; dark pans can cause the edges to overcook.
- If you don’t have parchment paper, greasing the pan with butter works too, but be sure to dust it with flour.
2. MAKE THE BROWNIE BATTER
Now, let’s whip up that rich brownie base!
Whisk – In a mixing bowl, whisk together the melted butter and granulated sugar until smooth and glossy. This creates a lovely shine and helps incorporate air for a lighter texture.
Add – Add the eggs and vanilla extract, mixing until well combined. The eggs add moisture and help bind the ingredients together.
Sift – In another bowl, sift together the flour, cocoa powder, baking powder, and salt. Sifting helps prevent clumps and ensures even distribution of dry ingredients.
Combine – Gradually add the dry ingredients to the wet mixture, mixing until just combined. Be careful not to overmix; you want those fudgy brownies!
Color – Stir in the red food coloring until evenly distributed. This is what gives your brownies their signature look!
HANDY TIPS
- Using gel food coloring provides a more vibrant red without adding too much liquid.
- For an extra kick of flavor, consider adding a dash of espresso powder to enhance the chocolate taste.
3. MAKE THE CREAM CHEESE SWIRL
This creamy layer takes your brownies to another level!
Beat – In a small bowl, beat together the softened cream cheese, powdered sugar, and vanilla extract until smooth and creamy. This mixture will create those delightful swirls that contrast beautifully with the brownie base.
HANDY TIPS
- Make sure your cream cheese is at room temperature for easier mixing.
- You can add a pinch of salt to balance out the sweetness if desired.
4. COMBINE AND BAKE
It’s time to bring everything together and bake these beauties!
Layer – Pour half of the brownie batter into the prepared baking pan, spreading it evenly across the bottom. This forms a solid base for your cream cheese swirl.
Dollop – Dollop spoonfuls of the cream cheese mixture over the brownie batter and use a knife or skewer to swirl it gently through—this creates that gorgeous marbled effect!
Top & Swirl Again – Pour the remaining brownie batter on top and swirl again if desired for an artistic finish!
Bake – Bake in your preheated oven for about 25 minutes or until a toothpick inserted into the center comes out with a few moist crumbs—this indicates they’re perfectly fudgy!
HANDY TIPS
- Keep an eye on them towards the end of baking; ovens can vary slightly.
- If you like more defined swirls, use less cream cheese mixture or create deeper swirls.
5. COOL AND SERVE
Let’s wrap this up so you can enjoy your scrumptious brownies!
Cool – Allow the brownies to cool in the pan for at least 10 minutes before using parchment paper overhangs to lift them out onto a wire rack. This helps them set properly before cutting into squares.
Make these once, and I wager they will invade your dreams every night too! – Nagi x
FAQ – Red Velvet Brownies
🍰 How long will these brownies keep?
These Red Velvet Brownies will stay fresh for about 3 to 4 days when stored properly. After day 1, they retain about 97% of their deliciousness, and by day 3, they drop to around 90% as the texture may become slightly denser. Store them in an airtight container at room temperature for the best results, but if you prefer a softer brownie, refrigerating them can help maintain moisture.
⏳ Do I really need to let them cool before cutting?
Yes, you definitely should! Allowing the brownies to cool for at least 10 minutes in the pan helps them set up nicely, which makes cutting into squares much easier. If you cut them too soon, they might fall apart or be too gooey in the center. Trust me, patience pays off here—your future brownie lovers will thank you!
❄️ Can I freeze these brownies for later?
Absolutely! These Red Velvet Brownies freeze beautifully. Allow them to cool completely and then cut into squares. Wrap each square tightly in plastic wrap and place them in a freezer-safe container or bag. They can be frozen for up to 3 months. To thaw, simply leave them at room temperature for a few hours or pop them in the microwave for about 15-20 seconds each.
🌾 Can I make these brownies gluten-free?
Yes, you can! Substitute the all-purpose flour with a 1: 1 gluten-free flour blend that contains xanthan gum. Be cautious about checking the humidity of your batter; sometimes gluten-free flours absorb more moisture. You might need to adjust slightly by adding a splash more melted butter or an extra egg if it seems too thick.
🔄 What can I use instead of red food coloring?
If you want to avoid artificial dyes, consider using beet juice as a natural alternative. Start with 2 tablespoons and adjust based on your desired color intensity—just keep in mind it may alter the flavor slightly! Alternatively, you could try using pomegranate juice for a similar hue while adding a fruity touch.
🤔 Why do I need to sift the dry ingredients?
Sifting together the flour, cocoa powder, baking powder, and salt is crucial because it aerates the mixture and helps prevent lumps from forming in your brownie batter. This step ensures that all ingredients are evenly distributed, leading to a smoother texture and perfect bake! It’s one of those steps that might seem tedious but trust me—it’s worth it!
🥄 Can I add nuts or other mix-ins?
Of course! If you’re feeling adventurous, feel free to fold in 1/2 cup of chopped nuts like walnuts or pecans into your brownie batter before pouring it into the pan. You could also add chocolate chips or white chocolate chunks for an extra layer of decadence. Just remember not to overmix after adding any extras; we want those swirls of cream cheese to shine through!
Troubleshooting
I will continue to add more to this Troubleshooting section as I start seeing questions coming through from people who have made the recipe.
Troubleshooting tips
“My brownies came out too thin! 😩”
- You may not have used enough brownie batter in the pan. Pouring only half of the batter might not create a thick layer; using more batter or a smaller pan can help achieve the desired thickness.
- If your baking powder was old or expired, it may not have activated properly, leading to a flatter brownie. Always check the freshness of your leavening agents!
- I bet they were still YUM though!
“My brownies turned out too dry! 😢”
- Overbaking is a common culprit; if you left them in the oven for too long, they can lose moisture. Aim for that toothpick test where it comes out with a few moist crumbs!
- You might have accidentally added too much flour while measuring. Be sure to spoon and level your flour instead of scooping directly from the bag, which can compact it.
- I bet they were still YUM though!
“The top of my brownies cracked! 😱”
- If you overmixed your brownie batter after adding the flour, it can create excess air, leading to cracking during baking. Mix gently just until combined for a smoother surface.
- Baking at too high of a temperature can also cause rapid rising and cracking. Make sure your oven is set to 350°F (175°C) as specified.
- I bet they were still YUM though!
“My cream cheese swirl didn’t show up! 😕”
- If your cream cheese mixture was too runny, it may have sunk into the brownie batter rather than staying on top. Ensure your cream cheese is softened but not overly melted when mixing.
- Not swirling enough could also lead to minimal visibility of the cream cheese. Try giving it a few more gentle swirls with a knife for that pretty marbled effect next time!
- I bet they were still YUM though!
Leave a Comment