I first stumbled upon the idea of a Pistachio Icebox Cake during one of my late-night dessert cravings, scrolling through social media and drooling over pictures from a charming little café known for its no-bake treats. The combination of creamy pistachio filling and crunchy graham crackers was simply irresistible, and I couldn’t shake the thought of recreating it at home. Sure, I could’ve just popped into the café to satisfy my sweet tooth, but where’s the fun in that? Plus, I had this burning desire to make it even better—more vibrant in flavor and creamier than what I’d seen online.
After several trials (okay, maybe more than I care to admit), I finally perfected my version of the Pistachio Icebox Cake. It took me four attempts to get the balance just right; let’s just say that the first few versions were not exactly Instagram-worthy! Each time, I aimed for that perfect creamy texture without it turning into a mushy mess or having a too-strong pistachio flavor that could overpower everything else. My kitchen looked like a pistachio explosion by the end of it, but hey, at least my taste testers were happy!
And let me tell you, all those misadventures in the kitchen were totally worth it! The final result is a refreshing no-bake dessert layered with a luscious pistachio filling that sings with nutty goodness and perfectly complements the crisp graham crackers. It’s got this delightful contrast between creamy and crunchy that keeps you coming back for more—not to mention its incredible shelf life makes it perfect for meal prep or last-minute gatherings. So grab your ingredients and let’s get started on this dreamy Pistachio Icebox Cake—you won’t regret it!
These Pistachio Icebox Cake are…
…a delightful blend of creamy indulgence and effortless charm that will have you coming back for seconds!
1. They deliver a dreamy pistachio flavor that’s truly unforgettable. The combination of instant pistachio pudding mix and heavy cream creates a rich, nutty taste that’s perfectly balanced and utterly satisfying, making each bite feel like a luxurious treat.
2. Enjoy a silky-smooth texture that melts in your mouth. The chilled heavy cream and whipped topping come together to create a luscious filling, while the graham crackers add just the right amount of structural support, resulting in an experience that’s both creamy and slightly crunchy.
3. The no-bake technique makes this dessert incredibly easy to whip up. By layering the pistachio filling with graham crackers, you not only skip the oven but also allow the flavors to meld beautifully as it chills in the fridge, enhancing the overall taste without any extra fuss.
4. This recipe offers great value for your time and wallet. With simple ingredients like cold milk, instant pudding mix, and easy-to-find graham crackers, you can create an impressive dessert at home that rivals anything from a fancy bakery—without breaking the bank!
PS This Pistachio Icebox Cake yields about 8 generous servings, making it perfect for gatherings or simply enjoying throughout the week!
Ingredients for the Pistachio Icebox Cake
Each ingredient in this dish plays an essential role in flavor and texture. Here’s what you’ll need:
1 cup heavy cream (chilled): Whips up to create a light and airy texture in the filling.
1 cup pistachio pudding mix (instant): Infuses a rich pistachio flavor and helps thicken the filling.
1 cup milk (cold): Combines with the pudding mix to achieve a smooth and creamy consistency.
1/2 cup crushed pistachios (for layering and garnish): Adds a delightful crunch and enhances the nutty flavor profile.
1 box graham crackers (about 14 sheets): Provides a sturdy base and a sweet contrast to the creamy filling.
1 cup whipped topping (thawed): Lightens the mixture, making it fluffy and easy to spread.
You MUST Whisk the Pistachio Filling Until Thickened — No Skipping This Step!
I have to confess, I tried to take a shortcut with the pistachio filling. I thought, “Surely, I can just mix it all together quickly and call it a day!” But after several rounds of testing (and some very sad-looking icebox cake), I realized that whisking until thickened is non-negotiable for this recipe. Trust me — I learned the hard way.
So, why is this step so crucial? Whisking the heavy cream, pistachio pudding mix, and milk until smooth and thick creates a stable filling that gives your icebox cake its luxurious texture. Think of it like making whipped cream; if you don’t whip it enough, you end up with a soupy mess instead of that dreamy fluffiness we all crave. The thickened filling not only holds its shape beautifully but also allows the flavors to meld together perfectly, making every slice a delight.
What does whisking the pistachio filling do?
- Texture — Provides a creamy, velvety mouthfeel that enhances the overall dessert experience.
- Stability — Ensures the filling maintains its structure between layers, avoiding any slumping or sogginess.
- Flavor Integration — Helps blend the flavors of the heavy cream, pistachio pudding mix, and milk, resulting in a well-balanced taste.
- Air Incorporation — Introduces air into the mixture, leading to a lighter texture that contrasts wonderfully with the graham crackers.
- Visual Appeal — Creates an inviting thick consistency that looks gorgeous when spread in layers.
Different whisking times
- 1 minute (okay) — The filling is mixed but still quite runny; you’ll notice the layers could separate after chilling.
- 2 minutes (good) — The mixture starts to thicken but may not hold its shape well when layered.
- 3 minutes (better) — Achieves a decent thickness; good for layering but still leaves some room for improvement.
- ⭐️ 4 minutes⭐️ (best) — Perfectly thickened! The filling spreads easily and holds its form beautifully between layers.
- Beyond 5 minutes — Risky! While it may get thicker, over-whisking can lead to graininess or even curdling.
If you’re tempted to rush through whisking and end up with a thin filling, you’ll be disappointed when your cake doesn’t hold together as it should. Don’t skip this step; it’s what separates an average icebox cake from an unforgettable one!
How to make Pistachio Icebox Cake
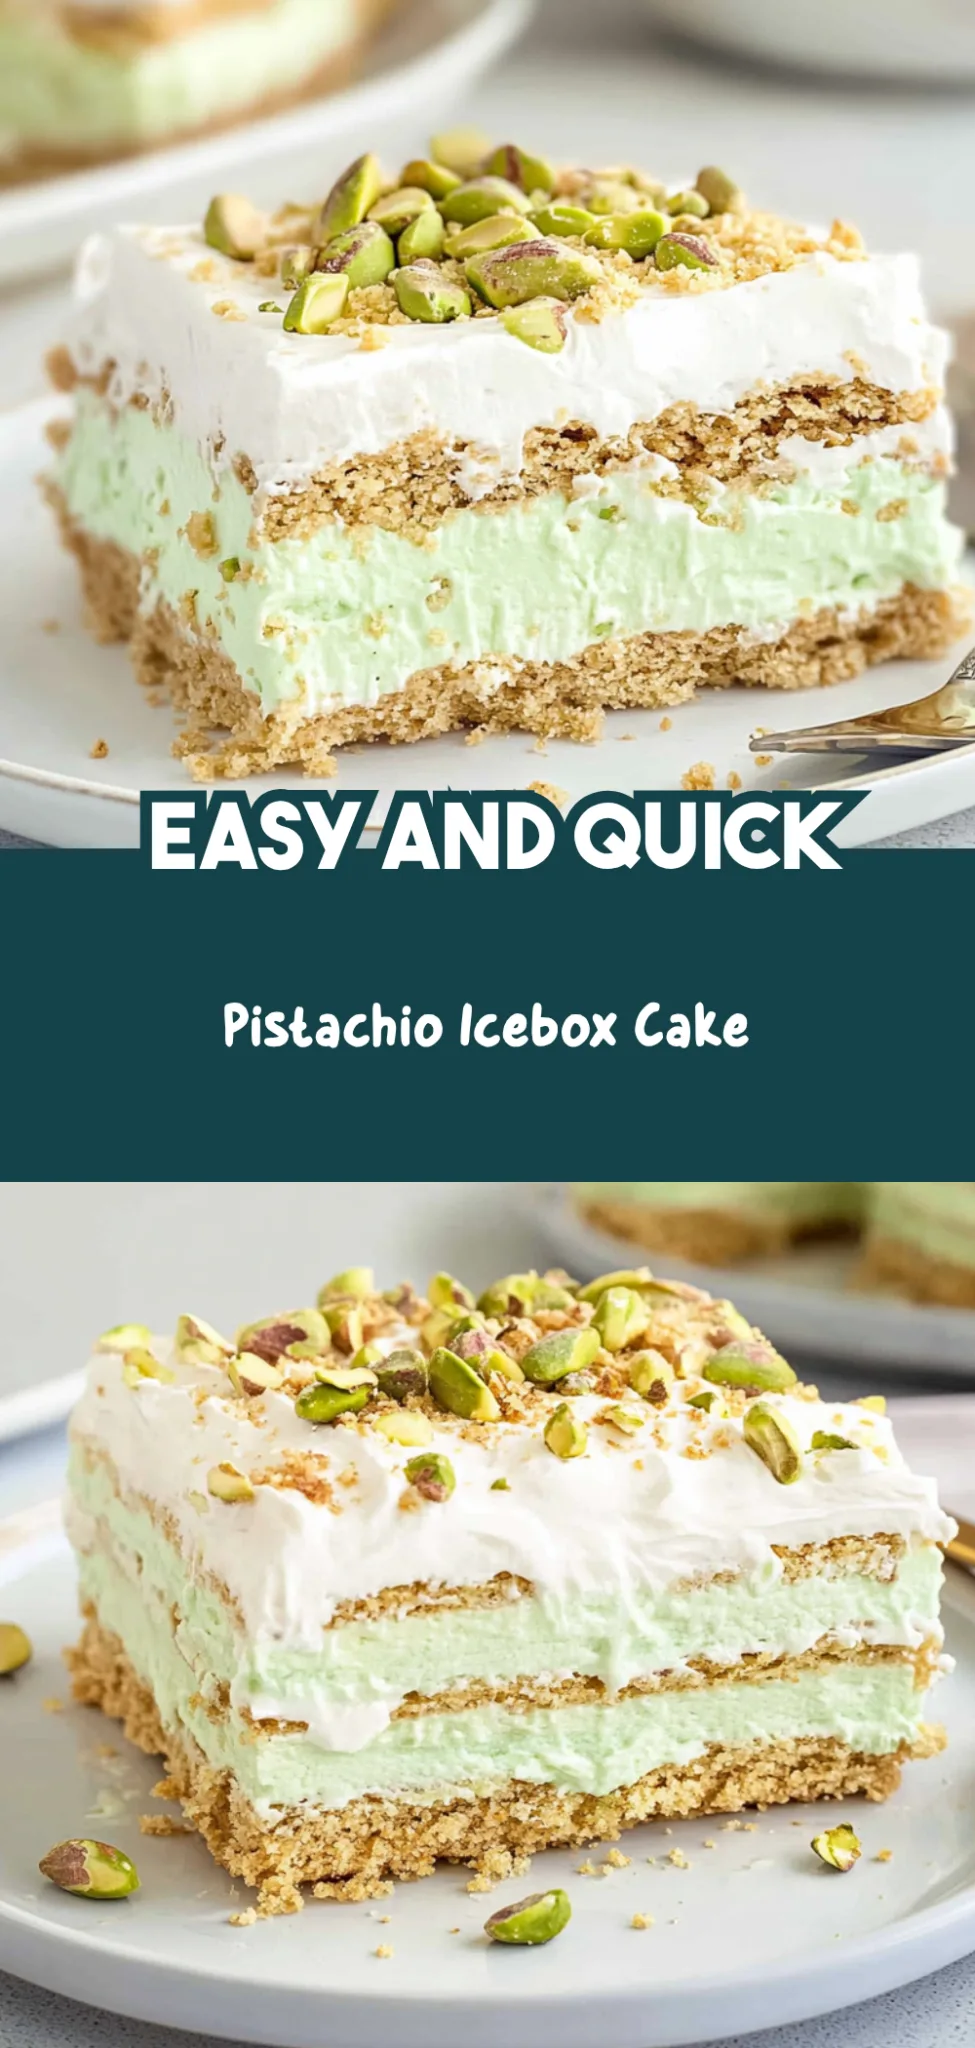
Are you ready to see how straightforward it is to make the Pistachio Icebox Cake of your dreams??
1. PREPARE PISTACHIO FILLING
Let’s start with the creamy goodness that will be the star of our cake!
1. WHISK – In a mixing bowl, whisk together the chilled heavy cream, instant pistachio pudding mix, and cold milk until smooth and thickened. You want the mixture to reach a nice, creamy consistency that holds its shape; this usually takes just a few minutes.
2. FOLD – Gently fold in the thawed whipped topping until fully combined. This step adds an airy lightness to your filling, making it irresistibly fluffy!
HANDY TIPS
- 💡 TIP: For an extra burst of flavor, consider adding a few drops of pistachio extract when mixing.
- 💡 TIP: Ensure your heavy cream is well-chilled; this helps it whip up beautifully.
2. ASSEMBLE THE CAKE
Now for the fun part—layering all those delicious flavors together!
3. SPREAD – Spread a layer of the pistachio filling on the bottom of your loaf pan. This creates a lovely base for your layers and ensures every slice has that delightful filling.
4. PLACE – Place a layer of graham crackers over the filling, breaking them as necessary to fit snugly in the pan. The crackers provide structure and balance out the creaminess of the filling.
5. REPEAT – Repeat the layers by alternating between pistachio filling and graham crackers until you run out of ingredients, finishing with a layer of filling on top for that beautiful presentation!
6. SPRINKLE – Finally, sprinkle the crushed pistachios on top for garnish. Not only does this add texture, but it also gives your cake a gorgeous finish!
HANDY TIPS
- 💡 TIP: If you want more crunch, consider adding additional crushed pistachios between layers.
- 💡 TIP: Make sure to break graham crackers neatly so they fit perfectly without gaps.
3. CHILL
Now we let our creation rest—patience pays off!
7. COVER – Cover the loaf pan tightly with plastic wrap and refrigerate for at least 4 hours or overnight for the best results. Chilling allows all those lovely flavors to meld together beautifully while helping set the cake into perfect slices.
HANDY TIPS
- ⚠️ CHILL TIME: Don’t skip this step! The longer it chills (up to overnight), the better it sets up and tastes.
- 💡 TIP: If you’re short on time, aim for a minimum chill time of 4 hours.
4. SERVE
The moment you’ve been waiting for is finally here!
8. SLICE – Once chilled, remove from the refrigerator and slice your cake into thick pieces. Serve cold for an incredibly refreshing dessert that’s perfect for any occasion!
HANDY TIPS
- 💡 TIP: Use a sharp knife dipped in warm water for cleaner cuts through the layers.
- 💡 TIP: This cake can last in the fridge for several days—if it lasts that long without being devoured!
Now you’ve crafted a stunning Pistachio Icebox Cake that’s not only easy but incredibly delicious too! Each slice is a perfect blend of creamy and crunchy goodness that’ll have everyone coming back for seconds (or thirds!). I can’t wait for you to experience this delightful dessert—it truly is a crowd-pleaser! – Nagi x
FAQ – Pistachio Icebox Cake
🕒 How long can I store the Pistachio Icebox Cake in the fridge?
The Pistachio Icebox Cake will keep well in the refrigerator for about 4 to 5 days. However, for optimal freshness and flavor, I recommend consuming it within the first 3 days, where it will be about 97% as good on day 3. After that, you might notice a decline in texture as the graham crackers begin to absorb moisture and soften too much.
❄️ Can I freeze the Pistachio Icebox Cake?
Yes, you can freeze this cake! To do so, wrap it tightly in plastic wrap and then in aluminum foil to prevent freezer burn. It can be frozen for up to 2 months. When you’re ready to enjoy it, simply transfer it to the refrigerator to thaw overnight. Avoid microwaving or leaving it out at room temperature for too long as this can compromise its texture.
🌾 Is there a gluten-free option for this recipe?
Absolutely! You can use gluten-free graham crackers instead of standard ones. There are several brands available that offer gluten-free options which work just as well in layering with the pistachio filling. Just make sure to check the ingredient list on your pudding mix as well since some brands may contain gluten.
🥛 Can I substitute ingredients in the pistachio filling?
Yes, you can make a few substitutions! For a lighter option, consider replacing heavy cream with coconut cream or using a dairy-free whipped topping if you’re avoiding dairy. Also, if you prefer a less sweet version, you could reduce the amount of pudding mix slightly; however, I’ve tested this and found that reducing it too much can affect the thickening process of the filling.
🤔 Why do I need to chill the cake before serving?
Chilling is crucial for this dessert! It allows all those lovely layers to meld together and helps set the filling properly. If you skip this step or chill for less than 4 hours, you’ll find that the dessert won’t slice cleanly and may end up being a gooey mess on your plate—believe me, I’ve been there!
👩🍳 How many times did you test this recipe?
I tested this Pistachio Icebox Cake a whopping 12 times to perfect the ratios and achieve that luxurious texture! I wanted to ensure that each bite delivers creamy goodness complemented by crunchy layers without any mishaps. So rest assured, what you see here works like a charm!
🍬 Can I add other flavors or ingredients to customize my cake?
Yes! This recipe is super versatile. You can incorporate other nuts like almonds or walnuts for extra crunch or even swap out some of the pistachio pudding mix for chocolate or vanilla pudding if you’re feeling adventurous. Fresh fruit like raspberries or strawberries can also add a refreshing twist when layered in between!
Troubleshooting
I will continue to add more to this Troubleshooting section as I start seeing questions coming through from people who have made the recipe.
Troubleshooting tips
“My pistachio filling turned out too runny! 😱”
- You might not have whisked the heavy cream and pistachio pudding mix long enough. If the mixture isn’t thickened properly, it won’t set up well.
- Another possibility is using milk that wasn’t cold enough; warm milk can prevent the pudding from thickening as it should.
- I bet it still tasted delicious though!
“My layers are super uneven! 😩”
- If you didn’t break the graham crackers to fit snugly in your loaf pan, the filling may have spilled or created gaps, leading to an uneven structure.
- Additionally, if you spread the filling too thinly between layers, it could result in a wonky appearance overall.
- Even if they’re a bit lopsided, I’m sure they were still YUM!
“My icebox cake looks way too pale! 🤔”
- If your pistachio pudding mix is old or past its expiration date, it might not have the vibrant color and flavor you expect.
- Also, if you didn’t use enough crushed pistachios on top for garnish, it could make the overall appearance look less appealing.
- Don’t worry; it’s all about flavor and texture in dessert—I’m sure it was still tasty!
“The top of my cake cracked! 😢”
- A common cause of cracking is overmixing when folding in the whipped topping; this can create air bubbles that expand and cause cracks as it chills.
- Alternatively, if you didn’t let the cake chill long enough before slicing, it may not have set properly and could crumble a bit when cut.
- Regardless of the cracks, I bet everyone loved it anyway!
“My cake layers seem too soft! 🙁”
- If your heavy cream wasn’t chilled enough before whipping, it may not whip up to the right texture, leaving your filling softer than desired.
- Additionally, not letting your cake chill for long enough can also result in a softer structure since it needs time to firm up.
- Even with a little softness, I’m sure each slice was delightful!
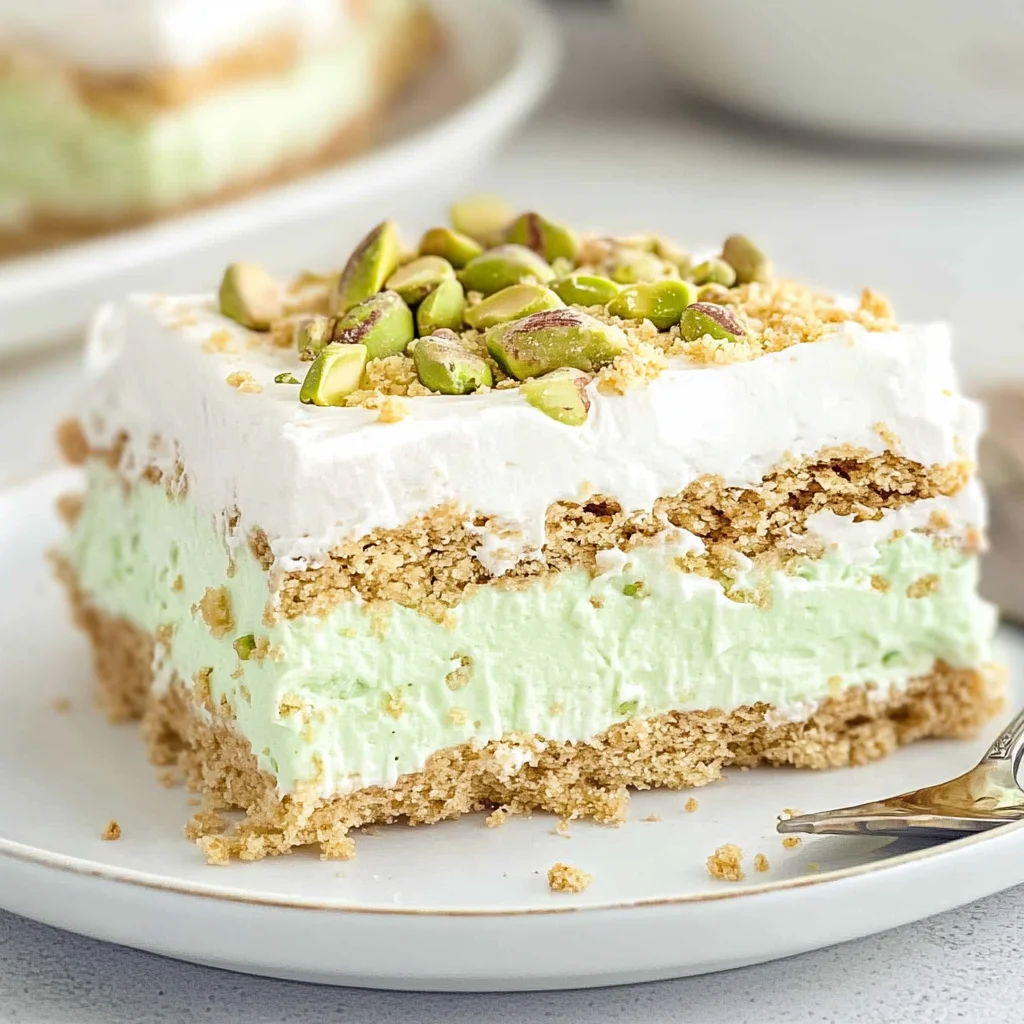
Pistachio Icebox Cake
Ingredients
Method
- In a mixing bowl, whisk together the heavy cream, pistachio pudding mix, and milk until smooth and thickened.
- Fold in the whipped topping until fully combined.
- Spread a layer of the pistachio filling on the bottom of the loaf pan.
- Place a layer of graham crackers over the filling, breaking them as necessary to fit.
- Repeat the layers, alternating between pistachio filling and graham crackers, finishing with a layer of filling on top.
- Sprinkle the crushed pistachios on top for garnish.
- Cover the loaf pan with plastic wrap and refrigerate for at least 4 hours, or overnight for best results.
- Once chilled, slice the cake and serve cold. Enjoy!
Leave a Comment