I first fell in love with pumpkin bread on a crisp autumn day at my favorite café, where the inviting aroma of freshly baked goods wafted through the air and wrapped around me like a warm hug. Their version was moist, flavorful, and practically melted in my mouth — it was a slice of seasonal heaven! I knew I had to recreate that experience at home, not just for the sheer joy of it, but also because let’s be real: buying gourmet treats can really add up. Plus, why not challenge myself to make something even better than the original?
After several attempts (and a few too many loaves that could have doubled as doorstops), I finally landed on the perfect balance for my Perfect Dutch Oven Pumpkin Bread. It took me about a week of trial and error — think flour explosions in my kitchen and a very confused cat wondering what the heck was going on. I wanted to achieve that ideal combination of moistness and flavor without compromising on ease. Some breads turned out too dense, while others didn’t capture that rich pumpkin spice essence I was dreaming of.
But oh boy, when I finally pulled out that perfectly golden loaf from the Dutch oven, it felt like winning the baking lottery! The texture is incredibly tender, with a delightful crust that gives way to a soft, flavorful interior bursting with warm spices. You’ll love how it stays moist for days, making it perfect for sharing at fall gatherings or enjoying solo with your morning coffee (no judgment here!). So grab your ingredients and let’s get baking — trust me, you won’t want to miss out on this delicious adventure!
These Perfect Dutch Oven Pumpkin Bread are….
… the ultimate fall indulgence that will have your taste buds dancing with joy!
1. They deliver an irresistibly warm aroma that fills your kitchen, thanks to the perfect blend of ground cinnamon, nutmeg, and ginger. These spices create a cozy atmosphere reminiscent of autumn gatherings, making every bite feel like a hug from the inside.
2. Incredible moisture – each slice is soft and tender, a result of using canned pumpkin puree combined with just the right amount of vegetable oil. This ensures that every piece melts in your mouth while keeping the texture light and airy, rather than dense or dry.
3. The Dutch oven technique enhances even baking and creates a unique crust that elevates this recipe above standard pumpkin bread. By trapping steam during the bake, it achieves a beautiful golden exterior while maintaining a wonderfully soft interior—something you simply can’t replicate in a regular loaf pan.
4. They offer exceptional value, as making your own Perfect Dutch Oven Pumpkin Bread at home is both cost-effective and satisfying. With simple pantry staples like flour and sugar, you can whip up a delicious loaf that rivals any gourmet bakery at a fraction of the price!
PS This recipe yields one beautifully shaped loaf that’s perfect for sharing—but trust me, you’ll want to keep it all to yourself!
Ingredients for the Perfect Dutch Oven Pumpkin Bread
Each ingredient in this dish plays an essential role in flavor and texture. Here’s what you’ll need:
- 2 cups all-purpose flour: Provides the structure and heartiness for the bread.
- 1 teaspoon baking soda: Helps the bread rise and creates a light texture.
- 1 teaspoon baking powder: Works with baking soda to ensure a fluffy loaf.
- 1 teaspoon salt: Enhances all the flavors and balances sweetness.
- 1 teaspoon ground cinnamon: Infuses warm, aromatic flavor that defines pumpkin bread.
- 1 teaspoon ground nutmeg: Adds a hint of earthy spice, complementing the pumpkin beautifully.
- 1/2 teaspoon ground ginger: Introduces a gentle warmth that elevates the overall taste.
- 1 cup canned pumpkin puree: Delivers moisture and rich pumpkin flavor throughout.
- 1/2 cup granulated sugar: Sweetens the bread while allowing other flavors to shine.
- 1/2 cup brown sugar: Contributes depth and a slight caramel note to the sweetness.
- 1/2 cup vegetable oil: Ensures a moist crumb and tender texture in every slice.
- 2 large eggs: Binds the ingredients together while adding richness.
- 1 teaspoon vanilla extract: Lifts the overall flavor profile with its sweet, fragrant notes.
You Must Preheat Your Dutch Oven. No Exceptions!
I confess, I thought about skipping this step. I was convinced that the magic of pumpkin bread could be unlocked without preheating my Dutch oven. Spoiler alert: I was wrong, and after several batches that ranged from sad to soggy, I learned my lesson the hard way. Trust me, you don’t want to skip this.
Preheating your Dutch oven is crucial because it sets the stage for even baking and helps create that perfect crust. Think of it like warming up a car engine before hitting the freeway; if you don’t give it time to get warm, you’ll end up with a sluggish ride (or in this case, dense bread). The intense heat helps the baking powder and baking soda in our dry ingredients activate properly, ensuring your Perfect Dutch Oven Pumpkin Bread rises beautifully and bakes evenly.
What Does Preheating Your Dutch Oven Do?
- Improves Rise — The hot environment helps the leavening agents (baking soda and baking powder) work effectively, leading to a taller loaf.
- Enhances Crust Texture — A preheated pot creates an initial blast of heat that helps form a golden-brown crust while keeping the inside moist.
- Promotes Even Baking — With consistent heat, your bread doesn’t suffer from hot spots, resulting in a uniformly cooked loaf throughout.
- Maximizes Flavor Development — The Maillard reaction starts quicker in a hot pot, enhancing caramelization and deepening flavors from spices like cinnamon and nutmeg.
- Retention of Moisture — The sealed environment of a Dutch oven retains steam which keeps the bread moist while baking; starting with heat only amplifies this effect.
Different Preheating Times
- 10 minutes (good) — Adequate for most recipes but might lead to uneven rise or slightly doughy centers.
- 15 minutes (better) — More consistent results; you’ll see improved crust formation and rise compared to shorter times.
- 20 minutes (great) — Ideal for achieving maximum oven spring and flavor development; your pumpkin bread will have an impressive texture.
- 25 minutes or more (optimal) — At this point, you’re ensuring every inch of your Dutch oven is perfectly heated. Just be cautious not to burn yourself when adding the batter!
Be warned: If you skip preheating entirely or cut corners on time, your pumpkin bread could end up flat and dense. There’s no shortcut here! Trust me – after those failed attempts, I learned that patience pays off with perfectly fluffy bread.
How to make Perfect Dutch Oven Pumpkin Bread
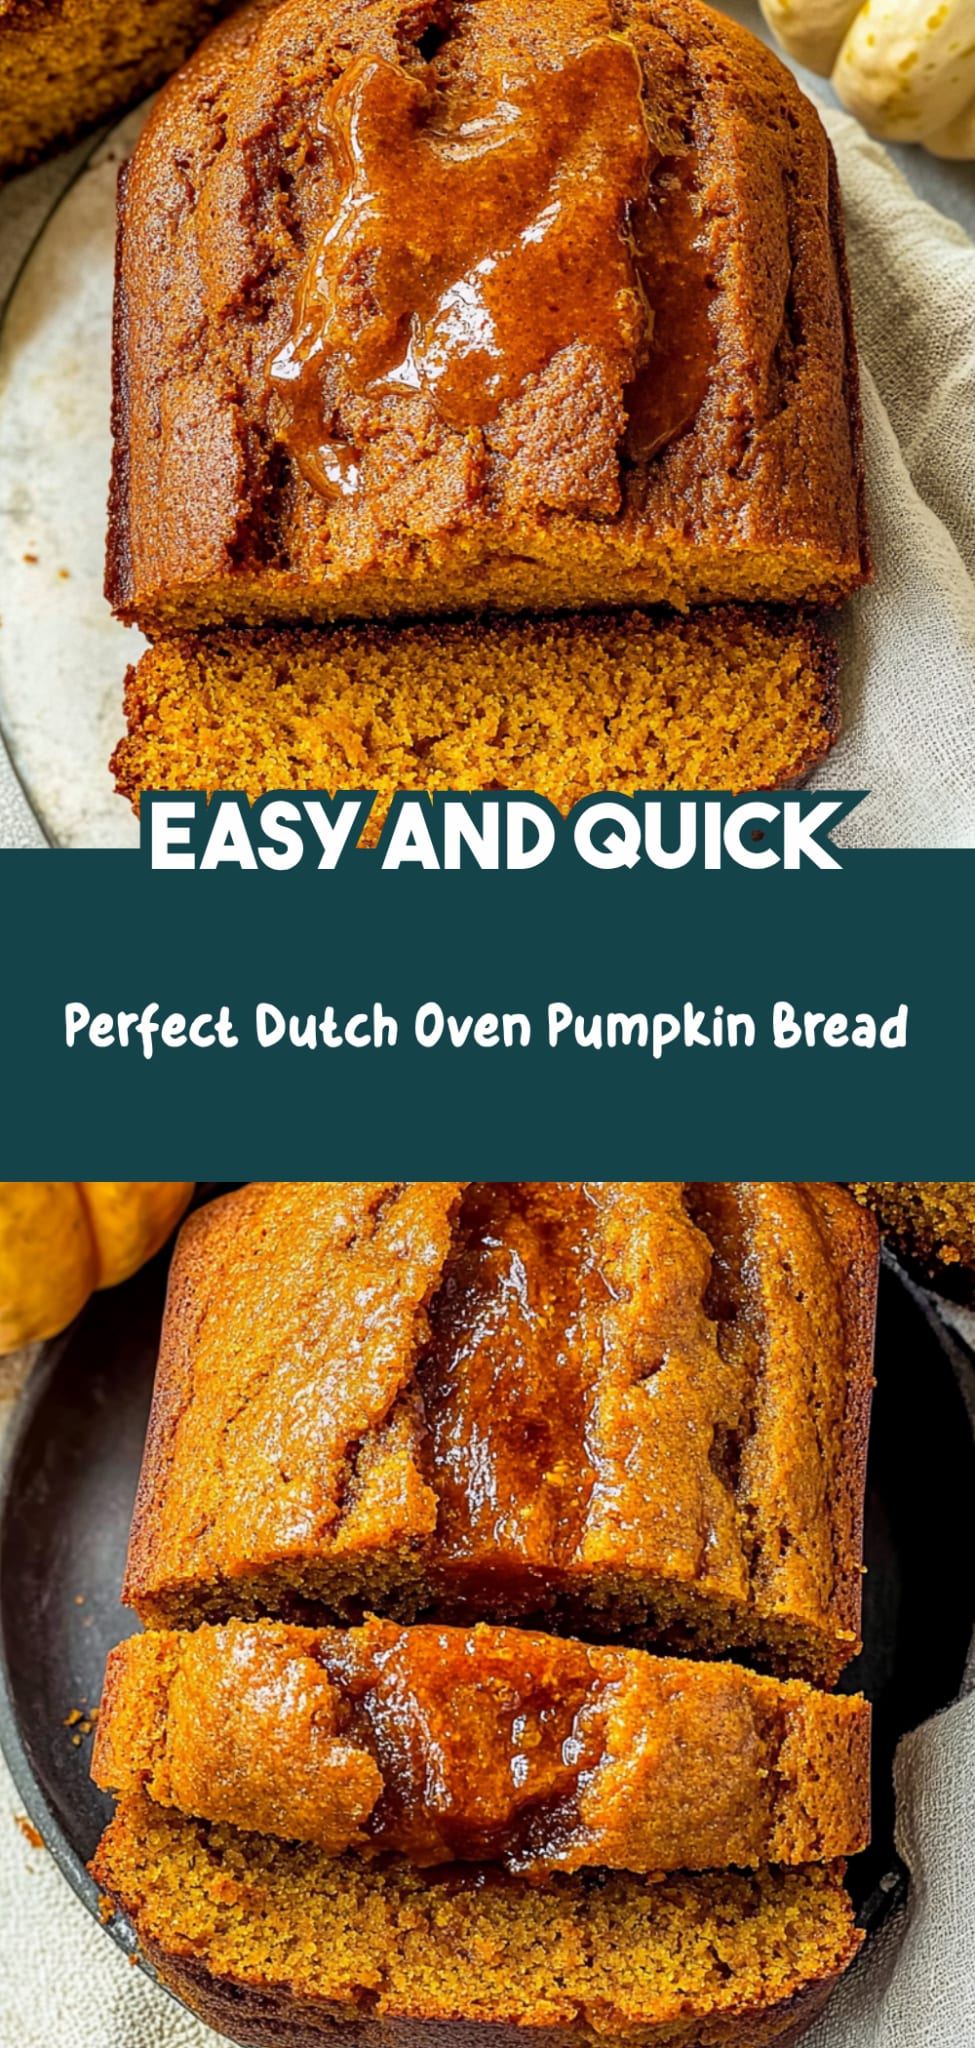
Are you ready to see how straightforward it is to make the Perfect Dutch Oven Pumpkin Bread of your dreams??
1. PREPARE THE BATTER
Let’s get that delicious batter ready for baking!
1. PREHEAT – Preheat your Dutch oven by placing it in the oven at 350°F (175°C). This helps create an even baking environment, ensuring your pumpkin bread cooks perfectly throughout.
2. WHISK DRY INGREDIENTS – In a mixing bowl, whisk together the dry ingredients: flour, baking soda, baking powder, salt, cinnamon, nutmeg, and ginger. This step is crucial as it ensures the leavening agents are evenly distributed, promoting a fluffy texture.
3. COMBINE WET INGREDIENTS – In another bowl, combine the wet ingredients: pumpkin puree, granulated sugar, brown sugar, vegetable oil, eggs, and vanilla extract. Mix until smooth. Your mixture should be velvety and vibrant—this is what will give your bread its delicious moisture and flavor!
4. MIX TOGETHER – Gradually add the dry ingredients to the wet ingredients, stirring until just combined. Do not overmix; you want a few lumps for that perfect texture!
HANDY TIPS
- Make sure your canned pumpkin puree is pure and not pie filling for better flavor.
- Sifting the dry ingredients can help remove any lumps and ensure a smoother batter.
2. BAKE THE BREAD
Now it’s time to transform that gorgeous batter into bread!
5. GREASE THE DUTCH OVEN – Grease the bottom and sides of the Dutch oven with oil or cooking spray. This prevents sticking and ensures easy removal after baking—nobody wants a delicious loaf stuck in the pot!
6. POUR BATTER – Pour the batter into the prepared Dutch oven, smoothing the top with a spatula for an even bake. A well-spread batter will rise evenly and create that beautiful dome shape we all love!
7. BAKE COVERED – Cover the Dutch oven with its lid and place it in the preheated oven. Bake for 45 minutes; this covered cooking allows steam to build up, resulting in a moist crumb—yum!
8. BAKE UNCOVERED – After 45 minutes, remove the lid and bake for an additional 15 minutes or until a toothpick inserted into the center comes out clean. The top should be golden brown and slightly firm to touch—this indicates your bread is ready!
9. COOL DOWN – Remove from the oven and let cool in the Dutch oven for 10 minutes before transferring to a wire rack to cool completely. This cooling period helps set your loaf’s shape while still allowing that lovely steam to escape.
HANDY TIPS
- For an added crunch, sprinkle some chopped nuts on top before baking!
- If you prefer a sweeter bread, feel free to increase both sugars slightly—just be mindful of texture.
Congratulations on mastering this delightful Perfect Dutch Oven Pumpkin Bread! It’s moist, flavorful, and bursting with autumn spices—a true crowd-pleaser for any gathering! Make this once, and I wager it will invade your dreams every night too! – Nagi x
FAQ – Perfect Dutch Oven Pumpkin Bread
🍞 How long will this pumpkin bread keep?
Homemade pumpkin bread can last for about 3-4 days at room temperature if stored properly. I recommend wrapping it tightly in plastic wrap or placing it in an airtight container to maintain its moisture. On day 3, it’s still about 97% as good as the day you baked it, but by day 4, you might notice a slight decline in freshness. For optimal taste and texture, it’s best enjoyed within the first few days!
⏲️ Can I skip preheating the Dutch oven?
No, you can’t skip preheating your Dutch oven! Preheating is crucial for achieving that perfect crust and even baking throughout the pumpkin bread. It helps to create steam that contributes to a moist crumb while ensuring the exterior bakes beautifully. Trust me; I’ve tried skipping this step, and the results were disappointing—definitely not worth it!
❄️ Can I freeze this pumpkin bread?
Absolutely! Freezing is a great way to extend the life of your pumpkin bread. Once cooled completely, wrap individual slices or the whole loaf in plastic wrap followed by aluminum foil to prevent freezer burn. It can be stored in the freezer for up to 3 months. When you’re ready to enjoy, simply thaw it overnight in the refrigerator or at room temperature for a few hours. A quick warm-up in the microwave or toaster oven brings back that fresh-baked taste!
🌾 Can this recipe be made gluten-free?
Yes! You can substitute all-purpose flour with a gluten-free flour blend that measures cup-for-cup like Bob’s Red Mill Gluten-Free 1-to-1 Baking Flour. Just ensure your other ingredients are also gluten-free (like baking powder). Keep in mind that gluten-free breads may have a different texture; they might be slightly denser but still delicious! I’ve tested several combinations, and honestly, they all turn out pretty well!
🥄 Can I reduce the sugar or substitute with sweeteners?
No, you cannot reduce the sugar without affecting the overall texture and moisture of the bread—it’s just not going to work well! I tried reducing both sugars multiple times and found that cutting them back makes the bread too dense and dry. If you want to use sweeteners like honey or maple syrup instead, you’ll need to adjust other liquid ingredients since these are more liquid than granulated sugar. Just remember: balance is key!
🤔 Why do I need to mix wet and dry ingredients separately?
Mixing wet and dry ingredients separately helps ensure even distribution of leavening agents like baking soda and baking powder throughout your batter. This method prevents clumps which could lead to uneven rising during baking—nobody wants lumpy bread! When you combine them gradually, you’ll achieve a smoother batter without overmixing, which is crucial for keeping your pumpkin bread light and fluffy.
🍂 What add-ins can I include for extra flavor?
You can customize your pumpkin bread with various add-ins! Some popular options include:
- Chopped nuts (walnuts or pecans)
- Chocolate chips (dark or white)
- Dried fruits (cranberries or raisins)
- Seeds (sunflower or chia)
Just keep in mind that adding too many ingredients may alter baking times slightly; so keep an eye on it! In my experience, a handful of chocolate chips never hurt anyone! 🍫
Troubleshooting
I will continue to add more to this Troubleshooting section as I start seeing questions coming through from people who have made the recipe.
Troubleshooting tips
“My pumpkin bread is too dense! 😩”
- You may have overmixed the batter after adding the dry ingredients. Overmixing can develop gluten in the flour, leading to a denser texture.
- Another possibility is that you used too much flour. Be sure to measure your flour correctly using the spoon-and-level method, as packing it down can lead to excess flour.
- I bet it was still YUM though!
“My bread came out too dry! 😢”
- This could be due to baking for too long. Even if a toothpick comes out clean, if it’s baked too long, moisture can evaporate and result in dryness.
- Additionally, not using enough pumpkin puree could also contribute to dryness. Make sure you’re using a full cup of canned pumpkin puree for optimal moisture.
- I bet it was still YUM though!
“The top of my bread cracked! 😬”
- If your oven temperature was too high or if you didn’t cover the Dutch oven during the first part of baking, this can cause the top to crack as it rises rapidly.
- Using old baking soda or powder could also impact how well your bread rises and create cracks. Ensure your leavening agents are fresh!
- I bet it was still YUM though!
“My pumpkin bread is unevenly baked! 😕”
- If you didn’t preheat your Dutch oven properly or if it’s not placed in the center of the oven, this could cause uneven baking. Always make sure it’s heated through before adding your batter.
- Also, overcrowding your oven with other dishes can affect airflow and result in uneven cooking. Give your Dutch oven some space!
- I bet it was still YUM though!
Leave a Comment