I’ve always had a soft spot for those warm, gooey chocolate chip cookies from my favorite bakery. You know the ones—crispy edges, a chewy center that practically begs you to take another bite? Well, when I found myself craving them one rainy afternoon, I decided it was high time to recreate that magic in my own kitchen. Plus, let’s be real: who doesn’t want the comfort of fresh-baked Chewy Chocolate Chip Cookies without having to fork over a small fortune every time? So, armed with determination and a touch of nostalgia, I set out on my cookie adventure.
Little did I know, perfecting these cookies would turn into a bit of a comedy show! After six attempts and enough flour-covered countertops to start my own bakery, I finally hit the jackpot. Each iteration brought its own set of challenges—I tried everything from chilling the dough to using different types of chocolate chips. It felt like a never-ending cycle of “not quite right,” but hey, at least my family enjoyed the “failed” batches (or so they said with crumbs on their faces). But trust me, after all that trial and error, I learned exactly what makes a cookie truly chewy and irresistible.
And let me tell you, the payoff was absolutely worth it! These Chewy Chocolate Chip Cookies are everything you could hope for: they’re thick yet tender, bursting with rich chocolate flavor while maintaining that delightful chewiness. The way they melt in your mouth is simply heavenly! I can’t wait for you to try this recipe—get ready to impress not just yourself but anyone lucky enough to snag one from your batch. Happy baking!
These Chewy Chocolate Chip Cookies are…
….the ultimate chocolate chip treat that will make your taste buds dance with joy!
1. They deliver a delectable balance of sweetness that’s truly unforgettable. The combination of brown sugar and granulated sugar creates a rich, complex flavor profile that enhances the chocolate chips, making each bite a delightful experience bursting with sweetness.
2. Perfectly chewy texture – these cookies have a satisfying chew thanks to the right balance of flour and butter. Using 2 cups of all-purpose flour helps establish a sturdy structure while allowing for that coveted soft center, ensuring every bite is just as enjoyable as the last.
3. Elevated baking technique — I always chill the dough before baking. This simple step allows the flavors to meld beautifully and prevents the cookies from spreading too much in the oven, resulting in thick, luscious cookies that look as good as they taste.
4. Incredible value – making these cookies at home is not only fun but also budget-friendly! With basic pantry ingredients like flour, sugar, and semi-sweet chocolate chips, you can whip up a batch that rivals any gourmet cookie shop without breaking the bank.
PS These Chewy Chocolate Chip Cookies yield about 24 deliciously indulgent cookies, perfect for sharing or savoring all by yourself!
Ingredients for the Chewy Chocolate Chip Cookies
Each ingredient in this dish plays an essential role in flavor and texture. Here’s what you’ll need:
2 cups all-purpose flour: Provides the structure and chewiness of the cookies.
1 teaspoon baking soda: Acts as a leavening agent for a perfect rise.
1 teaspoon salt: Enhances the sweetness of the chocolate and balances flavors.
1 cup unsalted butter (softened): Contributes richness and moisture to create a chewy texture.
3/4 cup brown sugar (packed): Adds depth of flavor and helps achieve that chewy consistency.
1/2 cup granulated sugar: Sweetens the cookies while promoting a tender crumb.
1 tablespoon vanilla extract: Infuses a warm aroma and enhances overall flavor.
2 large eggs: Binds the ingredients together and adds moisture for rich texture.
- 2 cups semi-sweet chocolate chips: Delivers bursts of chocolatey goodness in every bite.
The Chewy Factor: You Must Let the Dough Rest!
I have to confess, I tried to cut corners here — who wants to wait when a batch of chewy chocolate chip cookies is taunting you? I thought maybe just a quick chill would do the trick. Spoiler alert: it didn’t work. After testing multiple batches, I realized that letting the dough rest overnight is non-negotiable for achieving that perfect chewy texture.
So why is this resting period so crucial? Think of your cookie dough like a sponge; when you let it sit, it absorbs all the moisture from the wet ingredients, allowing the flour to fully hydrate. This process not only enhances the flavors but also affects the overall structure — resulting in cookies that have a delightful chewiness and perfectly balanced sweetness thanks to the combination of brown sugar and granulated sugar.
What does resting the dough do?
- Flavour: Resting allows time for the sugars to break down and develop deeper, more complex flavors that you simply can’t rush.
- Texture: The cookies become softer on the inside and chewy throughout, creating that irresistible contrast with a slightly crisp edge.
- Colour: Cookies rested longer develop a richer golden-brown color due to better caramelization of sugars during baking.
- Moisture retention: Allowing time for hydration means cookies stay fresher longer without becoming dry or crumbly.
- Spread control: A well-rested dough spreads less during baking, leading to thicker, heartier cookies that can hold their shape without turning into puddles.
Different resting times
- 30 minutes (okay) — Barely enough time for any significant improvement; cookies will still be decent but lack optimal chewiness.
- 1 hour (good) — Noticeably improved texture, but still lacks depth in flavor compared to longer rests.
- ⭐️ 12 hours⭐️ — Best results! Perfectly chewy and flavorful cookies that are true cookie nirvana.
- 24 hours (great) — Flavors deepen even further; however, be cautious about drying out if too long.
- Beyond 48 hours (risky) — Potential for diminishing returns as dough may dry out; could lead to overly dense cookies.
Don’t make the common mistake of skipping this resting step! Rushing it will leave you with flat, bland cookies instead of those dreamy chewy delights we all crave. Trust me; your future self will thank you for being patient!
How to make Chewy Chocolate Chip Cookies
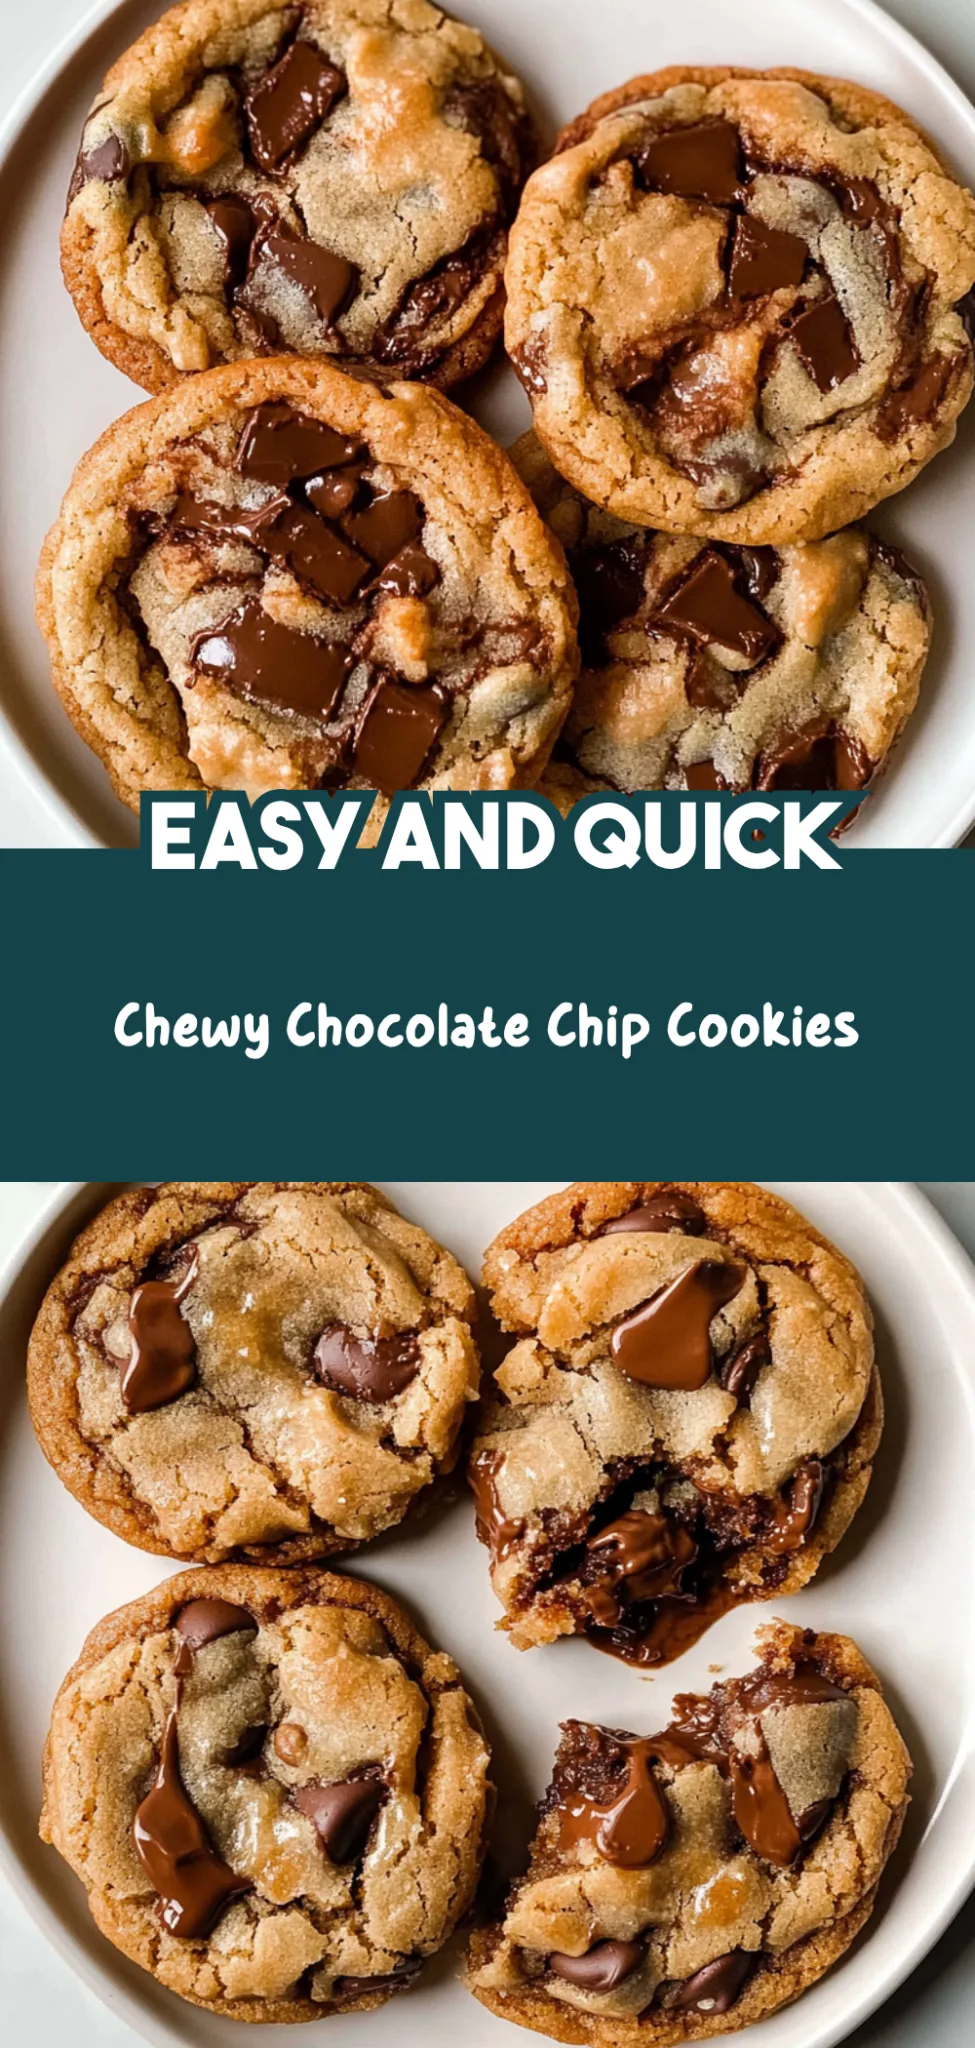
Are you ready to see how straightforward it is to make the Chewy Chocolate Chip Cookies of your dreams??
1. PREPARE THE OVEN
The first step is easy and crucial for achieving the perfect cookie texture!
Preheat – Preheat your oven to 350°F (175°C). This ensures that your cookies bake evenly and develop that irresistible golden-brown color.
2. MIX DRY INGREDIENTS
Let’s get that floury goodness ready!
Whisk – In a mixing bowl, whisk together the 2 cups of all-purpose flour, 1 teaspoon of baking soda, and 1 teaspoon of salt. This step not only combines everything but also incorporates air, making your cookies light and chewy!
HANDY TIPS
- Sifting: If you want extra light cookies, consider sifting the flour before measuring.
- Baking Soda: Make sure your baking soda is fresh; old baking soda can lead to flat cookies.
3. CREAM BUTTER AND SUGARS
Now we’re getting into the sweet stuff!
Cream – In another bowl, cream together 1 cup of softened unsalted butter, 3/4 cup of packed brown sugar, and 1/2 cup of granulated sugar until light and fluffy. This process aerates the butter and sugar mixture, giving your cookies their chewy texture.
4. ADD EGGS AND VANILLA
Time to bring in the eggs!
Beat – Beat in the two large eggs one at a time, ensuring each egg is fully incorporated before adding the next. Then stir in 1 tablespoon of vanilla extract for that warm, aromatic flavor that makes these cookies irresistible!
HANDY TIPS
- Egg Temperature: For best results, use room temperature eggs as they blend more easily.
- Vanilla Extract: Use pure vanilla extract for a richer flavor compared to imitation.
5. COMBINE MIXTURES
Let’s bring it all together!
Mix – Gradually add the dry ingredients to the wet mixture, mixing until just combined. Be careful not to overmix here — a few flour streaks are okay as this will keep your cookies tender.
6. ADD CHOCOLATE CHIPS
The pièce de résistance!
Fold – Gently fold in 2 cups of semi-sweet chocolate chips using a spatula until evenly distributed throughout the dough. You want those gooey pockets of chocolate in every bite!
HANDY TIPS
- Chocolate Choices: Feel free to mix it up with milk chocolate or dark chocolate chips depending on your preference!
- Chill Dough (Optional): If you have time, chill your dough for about 30 minutes before scooping — this helps prevent spreading during baking.
7. SCOOP COOKIES
It’s cookie dropping time!
Scoop – Using a tablespoon or cookie scoop, drop rounded tablespoons of dough onto a baking sheet lined with parchment paper. Make sure to space them about 2 inches apart as they will spread while baking.
8. BAKE
Get ready for that delicious aroma!
Bake – Place your cookies in the preheated oven and bake for about 10-12 minutes or until the edges are golden brown while the centers remain slightly soft. This contrast gives you that perfect chewy texture!
HANDY TIPS
- Batch Size: If you’re making smaller cookies, reduce the baking time by a minute or two.
- Oven Positioning: Bake one tray at a time in the center of the oven for even cooking.
9. COOL AND SERVE
Almost there!
Cool – Allow your cookies to cool on the baking sheet for about 5 minutes before transferring them to a wire rack to cool completely. This resting period helps them set up perfectly!
Make these once, and I wager they will invade your dreams every night too! – Nagi x
FAQ – Chewy Chocolate Chip Cookies
🍪 How long will these cookies keep?
Chewy chocolate chip cookies can typically be stored at room temperature in an airtight container for about 5 days. After that, they start to lose their freshness and texture. Here’s how the quality deteriorates:
- Day 1: 100% fresh
- Day 3: 97% as good
- Day 5: About 85% as good
For longer storage, you can freeze them. Just make sure they are completely cool before placing them in a freezer-safe bag or container, and they’ll last up to 3 months!
❄️ Do I really have to chill? YES YOU DO.
No, chilling is not required for this recipe, but it can enhance the flavor and texture of your cookies. If you choose to chill your dough for at least 30 minutes, you’ll notice a more developed flavor and chewier texture due to the hydration of the flour. It also helps prevent the cookies from spreading too much during baking—an important factor if you want thick, chewy cookies!
🥶 Can I freeze these cookie dough balls?
Absolutely! Freezing cookie dough is a great way to enjoy fresh-baked cookies whenever you want. Simply scoop the dough into rounded tablespoons and place them on a baking sheet lined with parchment paper. Freeze until solid, then transfer the cookie dough balls into a resealable plastic bag. When you’re ready to bake, there’s no need to thaw—just add an extra minute or two to your baking time.
🌾 Can these be made gluten free?
Yes, you can make gluten-free chewy chocolate chip cookies! Substitute all-purpose flour with a high-quality gluten-free flour blend. Look for one that contains xanthan gum since it helps mimic the structure provided by gluten. I’ve tried several blends and found that those containing almond flour give a lovely texture while maintaining chewiness.
🥛 Can I substitute butter with margarine or oil?
While you can use margarine or oil as substitutes for butter, it does affect both flavor and texture. Butter gives these cookies that rich taste and helps achieve that perfect chewy consistency. If you must substitute:
- Margarine: Use a stick variety; soften it just like butter.
- Oil: Use about 3/4 cup of vegetable oil for every cup of butter; however, expect a lighter texture.
🔍 Why do we cream butter and sugars together?
Creaming butter and sugars together is crucial because it incorporates air into the mixture. This process lightens the dough and contributes to a better rise when baked, resulting in soft and chewy cookies instead of dense ones. I’ve tested various methods, and trust me—taking this step seriously makes all the difference!
🍫 Can I add nuts or other mix-ins?
Definitely! You can customize your chewy chocolate chip cookies with different mix-ins like chopped nuts (walnuts or pecans work beautifully), dried fruit, or even different types of chocolate chips (like dark or white chocolate). Just keep in mind not to exceed more than about 1 cup total of additional mix-ins compared to the original recipe so as not to disrupt the dough’s balance. Go wild with your creativity!
Troubleshooting
I will continue to add more to this Troubleshooting section as I start seeing questions coming through from people who have made the recipe.
Troubleshooting tips
“My cookies came out wonky! 😅”
- Your dough may have been too soft when scooping. If your butter was too warm or you didn’t chill the dough, it can spread more than intended, leading to misshapen cookies.
- You might have used too much flour if it was not properly measured. Spoon and level your flour instead of scooping directly from the bag to avoid packing it down.
- I bet they were still YUM though!
“My cookies were not as thick as yours!” 🍪
- If your butter was melted instead of softened, this can lead to flatter cookies. Be sure to leave the butter out at room temperature until it’s soft but not greasy.
- You may have overmixed the dough when adding the dry ingredients. Mixing just until combined keeps air in the dough for a thicker result.
- I bet they were still YUM though!
“The surface of my cookies split and had massive crevices 😭”
- Overbaking is a likely culprit here. If you leave them in for too long, they can develop cracks on top as they dry out, so keep an eye on them!
- You might not have mixed the wet ingredients enough before adding the dry ones. Ensure everything is well blended to prevent uneven texture that can lead to cracks.
- I bet they were still YUM though!
“My cookies are too dark on the edges!” 🔥
- This likely means your oven temperature is running hot. An oven thermometer can help you check if it’s at the correct 350°F (175°C) for even baking.
- Using a dark baking sheet or one that’s non-stick can cause faster browning, so consider using lighter-colored baking sheets for more even results.
- I bet they were still YUM though!

Leave a Comment