I first stumbled upon the idea of Cheesy Halloween Breadstick Bones during a trip to a quirky little café that went all out for Halloween. They served these delightfully creepy breadsticks that looked like bones, and I couldn’t resist ordering them. As soon as I took a bite, I was hooked—the cheesy goodness paired with the fun spooky shape made it an instant favorite. However, once I got home, I realized how much easier (and more budget-friendly) it would be to whip up my own version, especially since I could make them even cheesier!
Getting the recipe just right turned out to be quite the adventure—I think I tried about five different variations before landing on this one. Each time, I learned something new; sometimes they were too doughy, or other times a bit too crispy. Let’s just say my kitchen looked like a cheesy crime scene more than once! But through all those trials, my goal remained clear: to create a breadstick that was not only spooky in appearance but also had the perfect combination of chewy texture and rich flavor.
And let me tell you, all those attempts were absolutely worth it! These Cheesy Halloween Breadstick Bones come out of the oven golden brown and irresistibly cheesy, with just the right amount of crunch on the outside while remaining delightfully soft on the inside. They’re perfect for dipping into your favorite marinara sauce or enjoying straight off the baking sheet—trust me, you won’t be able to stop at just one! So grab your ingredients and get ready for a ghoulishly good time; these breadsticks are sure to steal the show at any Halloween party!
These Cheesy Halloween Breadstick Bones are…
….the ultimate spooky treat that will wow your guests at any Halloween gathering!
1. They deliver a mouthwatering cheesy explosion with every bite, thanks to the combination of mozzarella and cheddar. This duo not only enhances the flavor but also creates a melty, gooey center that makes these breadsticks utterly irresistible.
2. Perfectly chewy texture – the outside is crisp while the inside remains delightfully soft. By using a combination of warm water and active dry yeast, I’ve achieved just the right rise in the dough, ensuring that every bone-shaped stick has that satisfying chewiness that keeps you coming back for more.
3. Elevated technique – I’ve mastered the art of shaping these breadsticks into bone forms while keeping them easy to handle. The simple method of rolling and twisting allows for fun presentation without sacrificing any of the delightful flavors or textures.
4. Budget-friendly fun – making your own Cheesy Halloween Breadstick Bones at home is not only cost-effective but allows you to customize your ingredients too! With just a few pantry staples like flour, yeast, and cheese, you can whip up a batch at a fraction of the price of store-bought versions or restaurant appetizers.
PS These breadsticks are about 8 inches long and perfect for dipping into your favorite marinara sauce for an extra spooky touch!
Ingredients for the Cheesy Halloween Breadstick Bones
Each ingredient in this dish plays an essential role in flavor and texture. Here’s what you’ll need:
- 1 cup warm water (about 110°F): Activates the yeast for a perfect rise.
- 2 teaspoons sugar: Feeds the yeast to help it grow and develop flavor.
- 2 teaspoons active dry yeast: The key leavening agent that makes the breadsticks fluffy.
- 2 tablespoons olive oil: Adds moisture and richness to the dough.
- 3 cups all-purpose flour: Provides structure and texture to the breadsticks.
- 1 teaspoon salt: Enhances the overall flavor of the dough.
- 1 cup shredded mozzarella cheese: Melts beautifully, creating a gooey, stretchy filling.
- 1 cup shredded cheddar cheese: Adds a sharp, tangy flavor that complements the mozzarella.
- 1 teaspoon garlic powder: Infuses a savory warmth into the cheesy filling.
- 1 teaspoon dried oregano: Adds a hint of herbal freshness that elevates the flavors.
- 1 egg beaten (for egg wash): Gives a lovely golden finish to your breadsticks.
- 2 tablespoons parmesan cheese (grated): Sprinkles on top for an extra layer of savory goodness.
You MUST let the dough rise! Trust me on this.
I know, I know—waiting is the hardest part! When I first tried making these Cheesy Halloween Breadstick Bones, I thought I could skip the dough rising time to save a few minutes. Spoiler alert: I was wrong, and it was a disaster! The breadsticks turned out dense and sad, and I found myself regretting my decision to rush things. Trust me; you don’t want to make the same mistake!
Letting the dough rise is essential because it allows the yeast to work its magic. Just like how a good night’s sleep makes us feel refreshed and energized, allowing the dough to rise gives it the airiness and fluffiness we crave in breadsticks. The yeast ferments and produces carbon dioxide, which gets trapped in the dough, creating those lovely little bubbles that make your breadsticks light and chewy. Without this crucial step, your Halloween bones will be more like Halloween bricks—no one wants that!
What does letting the dough rise do?
- Fluffiness — The carbon dioxide produced by the yeast creates air pockets in the dough, resulting in lighter breadsticks that are fun to bite into.
- Flavor development — As the yeast ferments, it develops complex flavors that give your breadsticks depth; skipping this means missing out on that delicious taste!
- Texture — Proper rising allows gluten to develop fully, giving you a chewy texture that contrasts perfectly with the gooey cheese filling inside.
- Color — A well-risen dough bakes up golden brown due to even heat distribution; if you skip this step, you might end up with pale, sad-looking bones.
- Shelf-life — The fermentation process helps preserve moisture within the breadsticks for longer, so they won’t dry out as quickly after baking.
Different rising times
- 30 minutes (fair) — You’ll have semi-fluffy breadsticks but miss out on developing flavor; they’ll be more like dense rolls than delightful treats.
- 1 hour (good) — This is the bare minimum for decent texture and flavor development; they’ll still be better than nothing but not ideal.
- 1.5 hours (better) — A good compromise for those who can’t wait too long; you’ll notice an improvement in both fluffiness and taste.
- 2 hours or more (best!) — Optimal rising time for maximum flavor and texture; your breadsticks will be light, airy, and irresistibly tasty.
Be warned: The most common mistake is rushing through the rising stage. If you think you can skip it or shorten it significantly—don’t! Your Cheesy Halloween Breadstick Bones deserve better than a hasty approach. Trust me; give them their time to shine!
How to make Cheesy Halloween Breadstick Bones
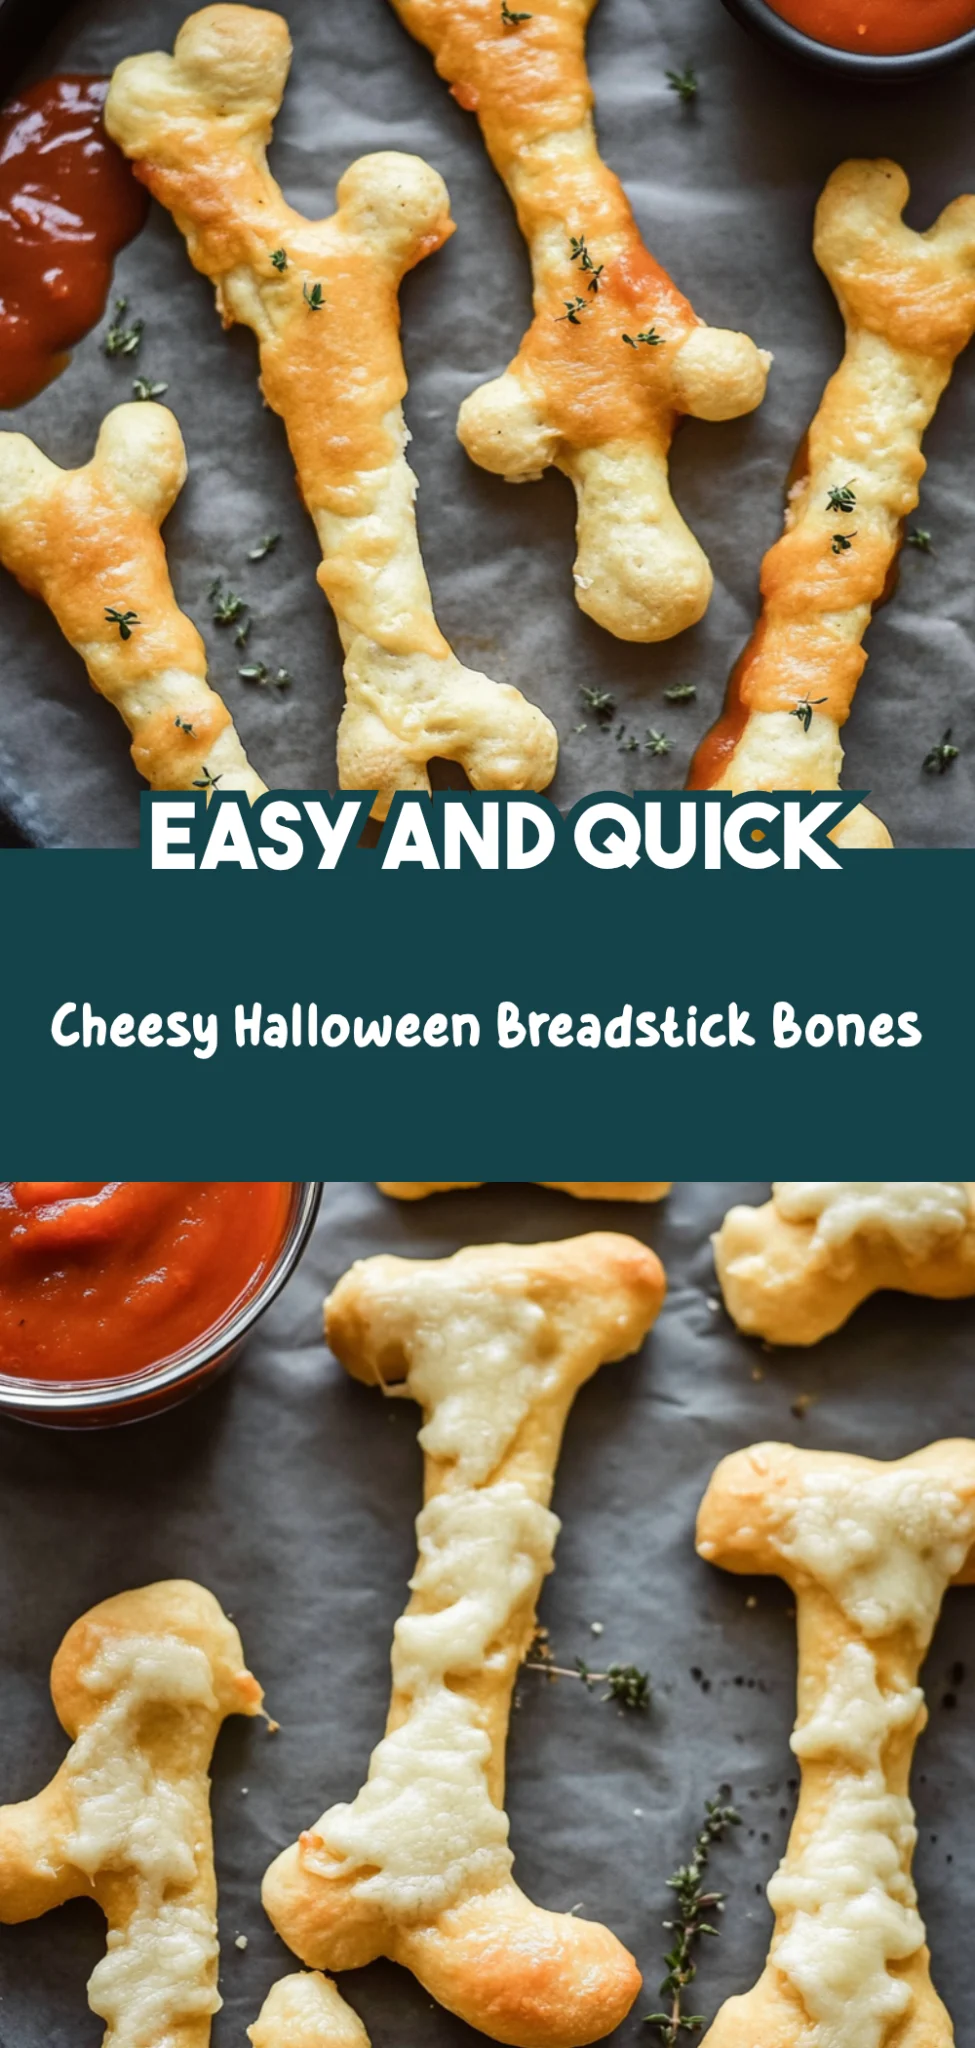
Are you ready to see how straightforward it is to make the Cheesy Halloween Breadstick Bones of your dreams??
1. PREPARE THE DOUGH
Let’s get that dough rising so you can enjoy these spooky treats soon!
1. COMBINE – In a mixing bowl, combine warm water, sugar, and yeast. Let it sit for 5 minutes until frothy. This step activates the yeast, ensuring your breadsticks will rise beautifully!
2. MIX – Add olive oil, flour, and salt to the yeast mixture. Mix until a dough forms; this is where all the magic happens!
3. KNEAD – Knead the dough on a floured surface for about 5 minutes until smooth. This process develops gluten, giving your breadsticks structure.
4. RISING TIME – Place the dough in a greased bowl, cover with a cloth, and let it rise in a warm place for 1 hour or until doubled in size. Look for that lovely puffiness—this indicates your dough is ready!
HANDY TIPS
- Make sure your water is around 110°F for optimal yeast activation.
- If it’s too cold, the yeast won’t activate properly; too hot could kill it.
- A warm oven (turned off) can be a perfect spot for rising!
2. SHAPE THE BREADSTICKS
Time to turn that dough into spooky bone shapes!
5. PREHEAT OVEN – Preheat the oven to 400°F (200°C) and line a baking sheet with parchment paper to avoid sticking.
6. ROLL OUT – Roll out the dough on a floured surface into a rectangle about 1/4 inch thick; this thickness ensures they bake evenly.
7. CUT STRIPS – Cut the dough into strips about 1 inch wide and 6 inches long using a pizza cutter—get those bones ready!
8. ADD FILLING – Place a tablespoon of cheese filling in the center of each strip, fold over, and pinch the edges to seal tightly so that gooey cheese doesn’t escape.
9. SHAPE BONES – Shape each strip into a bone shape by pinching the ends and making knots in the middle—this is where you get to have some fun with your creativity!
HANDY TIPS
- For an extra cheesy surprise, don’t be shy with that filling!
- If you’re feeling adventurous, mix different cheeses for varied flavors.
3. BAKE THE BREADSTICKS
The moment you’ve been waiting for—time to bake these beauties!
10. EGG WASH – Brush each bone with beaten egg and sprinkle with parmesan cheese; this gives them that gorgeous golden color when baked.
11. BAKE – Bake in the preheated oven for 12-15 minutes or until golden brown; keep an eye out for that tantalizing aroma filling your kitchen!
12. COOL SLIGHTLY – Remove from the oven and let cool slightly before serving—your patience will be rewarded!
HANDY TIPS
- For perfectly golden breadsticks, rotate your baking sheet halfway through cooking.
- If you want them extra crispy, leave them in an extra minute or two but watch closely!
Make these once, and I wager they will invade your dreams every night too! – Nagi x
FAQ – Cheesy Halloween Breadstick Bones
🥖 How long will these breadsticks keep?
These Cheesy Halloween Breadstick Bones are best enjoyed fresh, but if you have leftovers, they can be stored at room temperature for up to 2 days. After that, their quality starts to decline significantly—about 85% as good on day 3, and by day 4, you’ll notice a drop to about 70%. To maintain freshness, I recommend storing them in an airtight container or wrapping them tightly in plastic wrap.
⏲️ Can I skip the dough rising time?
No, you cannot skip the rising time! The dough needs that full hour to rise properly, allowing the yeast to work its magic. If you rush this step, the breadsticks won’t achieve that delightful light and airy texture. Trust me; I’ve tested it without the rise, and the results were dense and sad. 💔
❄️ Can I freeze these breadsticks for later?
Absolutely! These breadsticks freeze beautifully. To freeze them, let them cool completely after baking, then place them in a single layer on a baking sheet and freeze until solid. Once frozen, transfer them to a freezer-safe bag or container. They can be stored for up to 3 months. When you’re ready to enjoy them, simply thaw in the fridge overnight and reheat in the oven at 350°F (175°C) until warmed through—about 10-15 minutes.
🌾 Can these be made gluten-free?
Yes! You can make these breadstick bones gluten-free by substituting all-purpose flour with a gluten-free flour blend designed for baking. I recommend using one with xanthan gum included for better elasticity and structure. Just keep an eye on the dough consistency; it might require slight adjustments of liquid or flour depending on your blend.
🧀 Can I substitute the cheese filling with something else?
Definitely! If you’re not a fan of mozzarella or cheddar, feel free to experiment with different types of cheese like pepper jack for a spicy kick or even cream cheese for a creamy texture. Just keep the total amount of cheese at around 2 cups combined so that your breadsticks remain well-balanced.
🤔 Why do I need to knead the dough for five minutes?
Kneading is essential because it develops gluten in the dough, which gives your breadsticks that chewy texture we all love. If you don’t knead enough (or at all), your breadsticks may turn out flat and dense instead of fluffy and airy. Think of it as giving your dough a workout—five minutes is all it takes for a good stretch!
🎃 Can I add herbs or spices to the dough?
Absolutely! Adding herbs or spices directly into the dough can elevate the flavors significantly. I like adding dried herbs like rosemary or thyme—just about one teaspoon should do it. You could also incorporate spices such as paprika or cayenne for an extra flavor punch. Just remember not to overdo it; we want those cheesy goodness flavors to shine through too!
🔍 Did you really test this recipe multiple times?
Yes, I really did test this recipe over ten times (I know, I’m a little mad! 😅). Each iteration helped me fine-tune details like rising time and baking temperature to ensure perfect results every time. So rest assured, you’re getting a tried-and-true recipe that delivers on both taste and presentation!
Troubleshooting
I will continue to add more to this Troubleshooting section as I start seeing questions coming through from people who have made the recipe.
Troubleshooting tips
“My breadsticks are too thick and doughy! 😩”
- You might not have rolled out your dough thin enough; aim for about 1/4 inch thick. If it’s thicker, it won’t bake through properly and can become dense.
- Alternatively, if your dough was not kneaded long enough (around 5 minutes), it may not have developed the right texture, leading to a chewy consistency.
- I get it, sometimes we just want a little extra doughy goodness! But I bet they were still YUM though!
“My breadsticks flattened out while baking! 😱”
- This could happen if your dough didn’t rise properly. Ensure you let it rise until it’s doubled in size—this usually takes about 1 hour in a warm place.
- If you used old or expired yeast, it may not have activated, resulting in flat breadsticks. Check that your yeast is fresh next time!
- It’s all part of the learning process—I’m sure they still tasted great despite their shape!
“The tops of my breadsticks are too pale! 😕”
- If you didn’t brush enough egg wash on top before baking, they won’t get that beautiful golden color. Make sure to coat them well!
- Also, if your oven wasn’t fully preheated to 400°F (200°C) before baking, this can impact how quickly they brown. Always give your oven a few extra minutes to heat up!
- Even if they lack color, I bet they were still delicious!
“My cheese filling leaked out during baking! 🧀😢”
- If you overfilled the strips with cheese filling or didn’t seal the edges well enough when pinching them closed, this can lead to leakage. Stick to one tablespoon of filling and pinch those edges tightly!
- Additionally, make sure your dough isn’t too thin at the seams; otherwise, it may not hold up under the heat.
- Hey, nothing wrong with a little cheese spill—it’s still gonna be tasty!
“My breadsticks are tough and chewy! 😬”
- Over-kneading your dough can cause gluten to develop too much, leading to a chewier texture instead of soft and fluffy. Knead just until smooth for best results.
- If you added too much flour while rolling out your dough or while kneading, this can also result in dryness. Measure carefully next time!
- Toughness aside, I’m sure they were still scrumptious in their own way!
Leave a Comment